
Quick answer
Use these practical checks to compare the options in this guide.
- Check the existing concrete and the intended use of the space.
- Compare finish, slip resistance, cleaning and maintenance needs.
- Ask for site-specific advice before setting a scope, method or budget.
At Superfloor Australia, we understand that polished concrete flooring price is a key consideration for many property owners.
This comprehensive guide will break down the factors influencing costs, provide average price ranges. And highlight additional expenses to consider.
We’ll also explore the long-term value of polished concrete floors and offer tips for choosing the right contractor.
What Impacts Polished Concrete Flooring Costs?
Project Size and Complexity
The size of your project significantly impacts the overall cost. Larger areas often cost more due to the increased materials and labour required.
But, per square metre costs may decrease with larger projects, as economies of scale come into play.
A 100-square-meter open plan office will likely cost less per square meter than a 50-square-meter restaurant with multiple corners and obstacles.
Existing Concrete Condition
The state of your current concrete floor plays a crucial role in determining costs. New slabs or well-maintained surfaces require minimal preparation, keeping costs down.
In contrast, older floors with cracks, unevenness, or contamination need extensive repairs and grinding. This can significantly increase the overall cost of the project.
Desired Finish and Customization
The level of polish and customization you choose directly affects the price. A basic grind and seal finish starts around $50 per square meter.
While a mechanically polished floor can cost $100 or more per square meter. Adding colors, patterns, or exposed aggregates further increases costs but can create stunning, unique surfaces.
Local Labor and Material Costs
Labor typically accounts for 60-70% of polished concrete flooring costs.
Rates vary significantly by location, with urban areas generally commanding higher prices due to increased demand and living costs.
For instance, prices in Brisbane might differ from those in regional Queensland. Material costs, including diamond abrasives and sealants, also fluctuate based on market conditions and supplier relationships.
Equipment and Technology
The type of equipment and technology used in the polishing process can influence costs.
Advanced machinery and high-quality diamond tooling may increase initial expenses but often result in superior finishes and faster completion times.
Some contractors (like Superfloor Australia) invest in state-of-the-art equipment to deliver exceptional results, which can affect pricing.
These factors interplay to determine the final cost of your polished concrete flooring project.
While it’s tempting to focus solely on the lowest price, quality workmanship and materials make sure a durable, long-lasting floor.
To get a clear picture of what your specific project might cost, it’s essential to look at average price ranges across different settings and applications.
How Much Does Polished Concrete Flooring Really Cost?
Residential Pricing
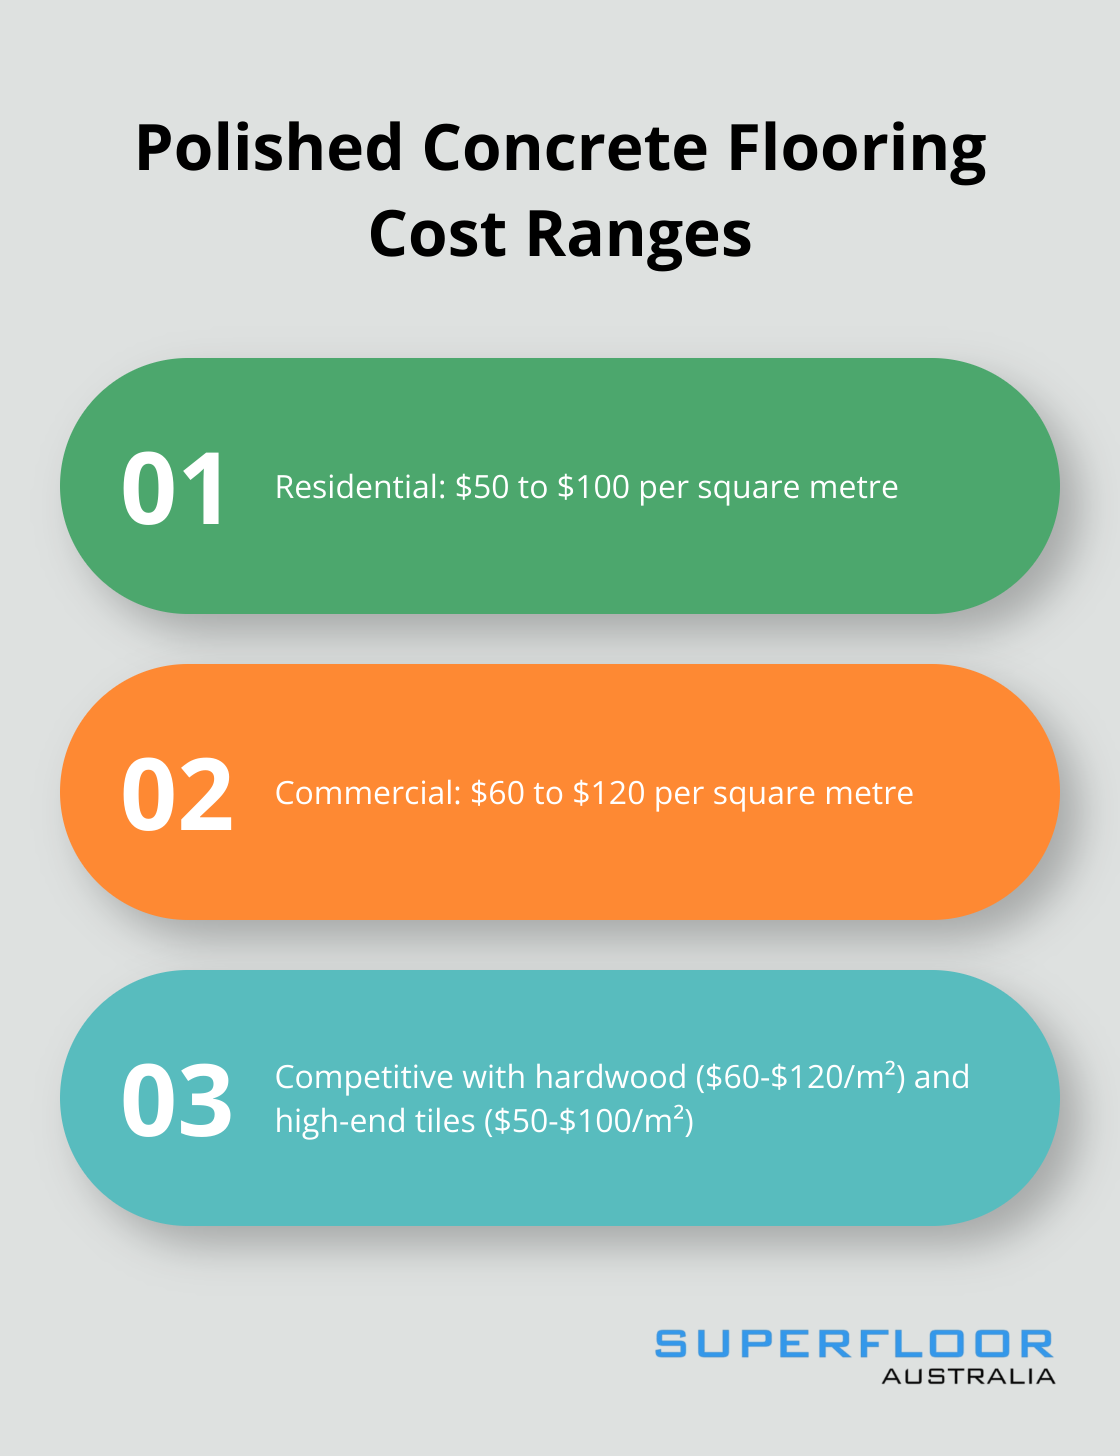
Polished concrete flooring costs for residential projects in Australia typically range from $50 to $100 per square metre. This price variation reflects differences in finish quality, customization. And existing floor conditions.
Commercial Pricing
For commercial spaces, prices typically fall between $60 and $120 per square metre. The higher end of this range often applies to larger areas with complex designs or those requiring extensive preparation work.
Cost Comparison with Alternative Flooring
When considering polished concrete, it’s helpful to compare costs with other popular flooring options:
- Hardwood flooring: $60 to $120 per square meter
- High-end tiles: $50 to $100 per square meter
This puts polished concrete in a competitive position, especially when factoring in long-term benefits.
Long-Term Cost Benefits
The initial investment in polished concrete might seem substantial. But the long-term savings are major.
Polished concrete floors can last for decades with proper maintenance, far outlasting many alternative flooring materials. This durability translates to lower replacement and repair costs over time.
Maintenance costs are also notably lower.
Unlike carpet that requires frequent vacuuming and occasional deep cleaning, or hardwood that needs refinishing every few years, polished concrete typically only needs regular mopping and occasional resealing.
This can lead to substantial savings in both time and money over the life of the floor.
Energy Efficiency Savings
An often-overlooked benefit of polished concrete is its potential for energy savings.
Polished concrete floors have a high thermal mass, which generally makes them feel slightly cool to the touch.
This property can help regulate indoor temperatures, potentially reducing heating and cooling costs.
While it’s challenging to put an exact figure on these savings (as they vary greatly depending on the specific building and climate), the energy efficiency of polished concrete floors can contribute to overall building sustainability.
The long-term value proposition of polished concrete is compelling. But it’s important to consider additional costs that may arise during the installation process.
Let’s explore these potential expenses in the next section to give you a complete picture of what your polished concrete project might entail.
Hidden Costs of Polished Concrete Flooring
Concrete Preparation and Repairs
The condition of your existing concrete slab impacts additional costs. Floors with cracks, unevenness, or contamination require repairs before polishing. Extensive surface preparation can add $10 to $30 per square meter to your project cost (according to industry standards).
Severely damaged floors might need resurfacing. This process applies a new layer of concrete over the existing slab, with the cost of polished concrete floors typically ranging between $50 and $65 per square meter.
Moisture Mitigation
Moisture issues in concrete can damage your polished floor if left unaddressed. Moisture testing costs between $4 and $7 per square foot for the initial slab.
High moisture levels require a mitigation system, ranging from $10 to $25 per square meter (depending on the severity and solution).
Customization Costs
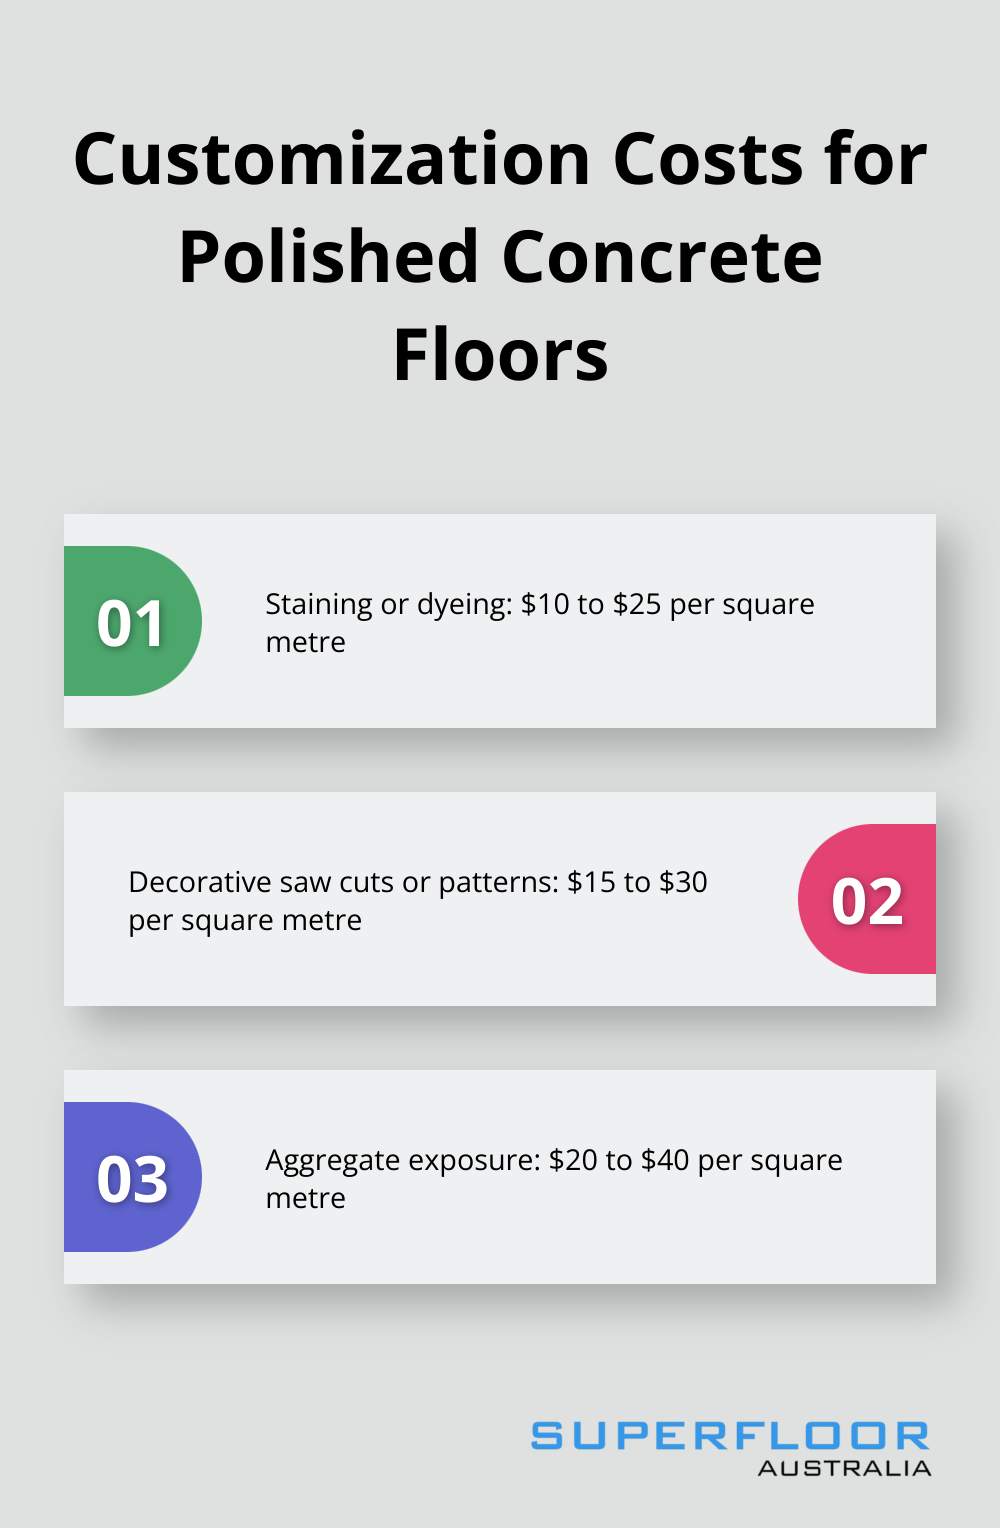
Many property owners choose customization for a unique look. Popular add-ons include:
- Staining or dyeing: $10 to $25 per square meter
- Decorative saw cuts or patterns: $15 to $30 per square meter
- Aggregate exposure: $20 to $40 per square meter
Prices vary based on design complexity and products used.
Protective Sealants
A high-quality sealer protects your polished concrete floor and enhances its longevity. Expect to pay between $5 and $15 per square meter for a good quality sealer application.
A proper sealer can significantly extend the life of your floor, saving money in the long run.
Ongoing Maintenance
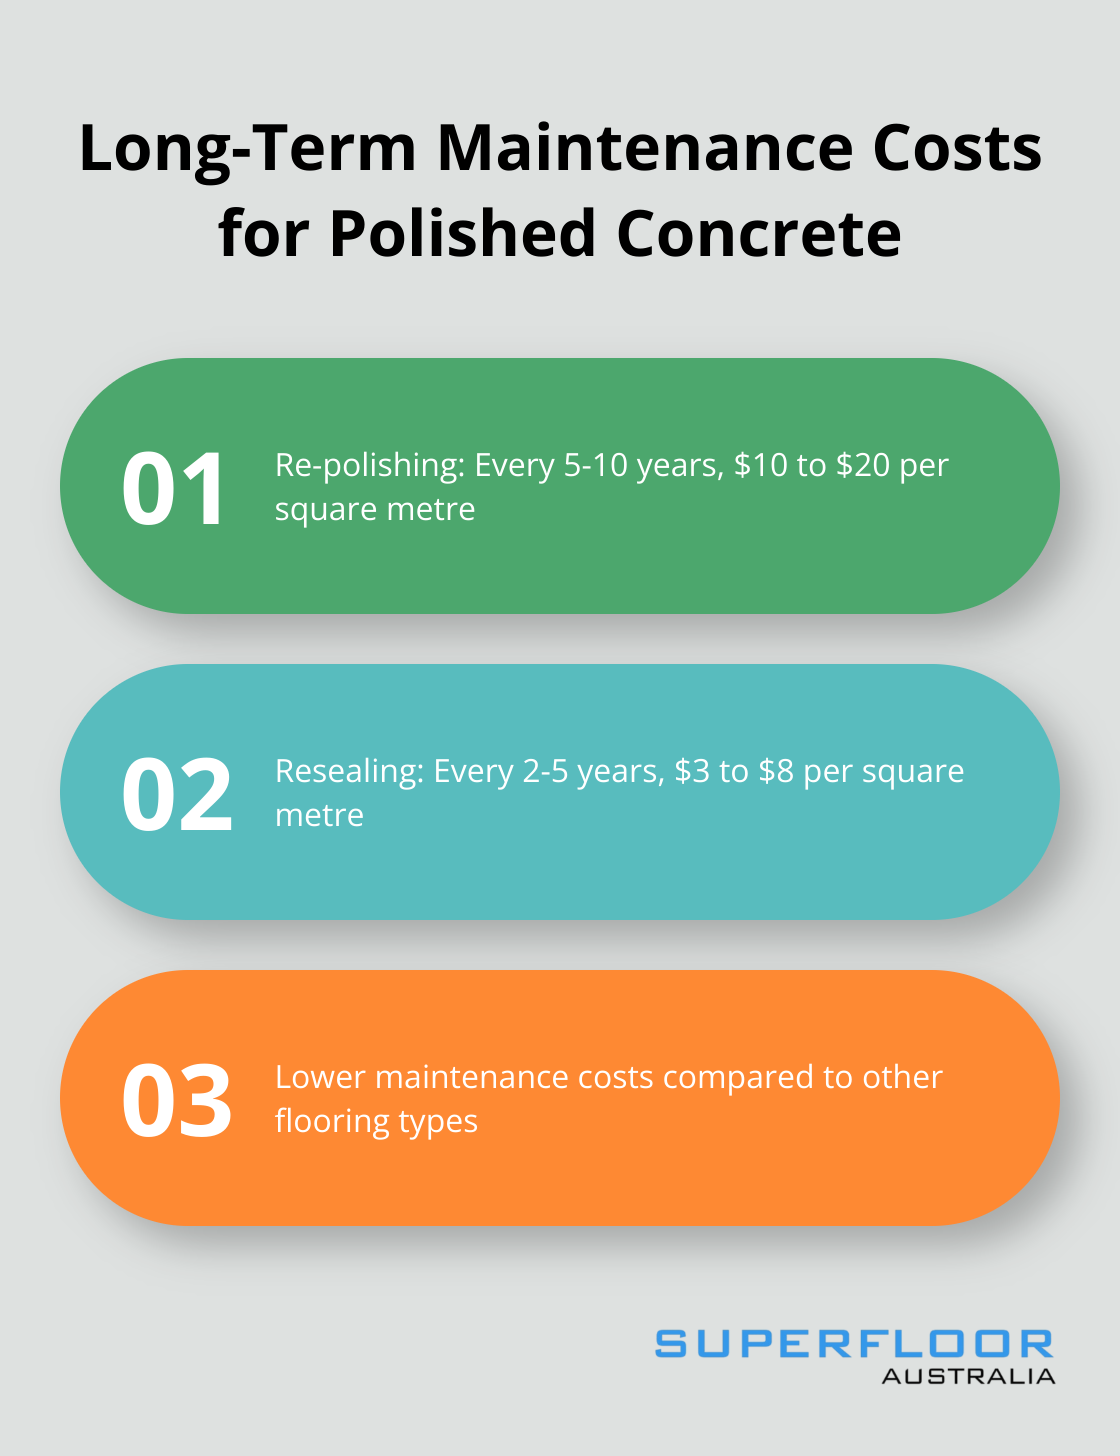
Polished concrete floors not only offer durability and aesthetic versatility but also significantly reduce maintenance costs. But, they’re not entirely maintenance-free. Budget for periodic re-polishing and resealing:
- Re-polishing: Every 5-10 years, costing $10 to $20 per square meter
- Resealing: Every 2-5 years, costing $3 to $8 per square meter
These maintenance costs are generally lower than those associated with other flooring types. But they’re important to factor into your long-term budget.
Final Thoughts
Polished concrete flooring offers exceptional long-term value for property owners.
The polished concrete flooring price reflects not just the material but also the craftsmanship and technology involved in creating a stunning, long-lasting surface.
Investing in quality installation pays dividends in the form of a floor that maintains its beauty and use for years to come.
We at Superfloor Australia understand the importance of balancing cost with quality and durability.
Our team delivers high-quality polished concrete flooring in Brisbane, using advanced techniques and equipment to create surfaces that are visually striking and highly resistant to wear and tear.
We tailor our solutions to meet the unique needs of each project, whether it’s for residential, commercial, or industrial spaces.
The reduced maintenance costs, energy efficiency.
And timeless appeal of polished concrete floors make them a wise investment for those looking to improve their space while minimizing future expenses.
Choosing a trusted provider ensures that your polished concrete floor will stand the test of time, providing beauty and use for years to come.
You can contact us to discuss your specific polished concrete flooring needs and receive a personalized quote.
Put this polished concrete guide into plain steps
Start with the floor in front of you. Each slab is different. Note its age and use. Look for cracks and old repairs.
Check for paint, glue or other coats. Mark wet spots and low areas. These facts shape the work.
Check the space
Walk the full area. Take clear photos. Add a tape measure for scale. Note stairs and tight doors. Check where tools can enter. Find the power and water points. Think about dust and noise. Ask who will use nearby rooms.
Set the goal
Choose the main need first. It may be grip, easy care or a clean look. Indoor and outdoor floors need different plans. Water can change the right finish.
Heavy traffic can change it too. A sample can help show the aim. The real slab may still vary.
Make a short brief
- State the floor area.
- Say if the slab is new or old.
- List what must come off.
- Note cracks, steps and edges.
- Describe the look you want.
- Share the work hours.
- Explain how the room is used.
- Add any access limits.
Compare the same scope
Give each contractor the same facts. Ask what prep is included. Ask how edges are done. Check how dust will be kept down. Ask which marks may stay.
Confirm the finish and sheen. Check when the floor can be used. Get care notes in writing.
Plan the work
Put floor work in the right order. Finish wet or messy work first. Keep other trades off the final surface. Plan a safe path around the work zone.
Allow time for each coat or seal. Protect the floor before gear comes back.
Keep the floor in good shape
Remove dust and grit often. Clean spills as soon as you can. Use the right cleaning product. Test a new product in one small spot.
Put mats at busy doors. Use pads under chairs and tables. Keep the finish and care notes.
This list turns broad advice into a clear start. A site check can confirm the details. For help with your slab, ask Superfloor Australia for a project review.
A plain checklist for your polished concrete plan
Use this list as a calm first step. Start with the slab. Walk the whole floor. Look at each edge. Mark each crack. Note old paint or glue.
Take clear photos. Add a tape for scale. Write down the floor size. Keep these facts in one file.
Check the slab
Find out if the slab is new or old. Look for chips and worn spots. Note each patch. Check for high and low points.
Mark stains and damp spots. See if old coats still bond well. Do not hide a fault from the quote. A clear list helps the work team plan.
Take one wide photo of each room. Then take close shots of key marks. Put a rule in each close shot. Name the photos by room.
Add the date. Keep the raw files. They may help when the scope is set. They also help if the floor changes before work starts.
Measure the space
Measure the length and width. Break odd shapes into small parts. Add the parts at the end. Mark steps and ramps. Count the door gaps.
Note tight halls and sharp turns. Check where large tools can pass. Tell the team if a lift or stair must be used.
Walk the path from the road to the floor. Check gates and doors. Look for soft ground. Find a safe load point.
Note where a work van can park. Check the power point. Find the water point. Ask where waste may go. Site access can change the work plan.
Set one clear aim
Choose the main need first. You may want a clean look. You may need more grip. You may need old glue gone.
You may want a floor that is easy to care for. Rank each need. Share the top three. This keeps the quote clear and helps stop vague terms.
Use sample photos with care. A photo can show a broad style. It cannot show your exact slab. Stone, shade and old marks will vary.
Point out what you like in each shot. It may be the sheen, the stone view or the tone. Put those notes beside the image.
Think about daily use
Say who will use the floor. Note bare feet, shoes, carts or cars. Say if rain can reach it. Note grease, food or soil.
List the way the floor is cleaned now. Add the times when the space is most busy. These facts help link the floor plan to real use.
Check what sits on the floor. Mark each fixed item. List chairs, racks and heavy gear. Say what can move. Note hot or wet work near the slab.
Think about pets and young kids. Plan how the site will stay clear. The work zone needs room and safe access.
Plan the work time
Write down the key dates. Add the first day the site is free. Add the date when the room must be back in use. Note other trades.
Put wet and dusty work first. Keep fresh work free from foot traffic. Allow time for each set or dry stage.
Do not plan from the last date alone.
Ask what must leave the room. Check who will move it. Set a safe store point. Tell the team if part of the site must stay open.
Mark a path for staff or guests. Add any rules for noise. Share site hours. Put each agreed limit in the scope.
Make the quote brief
Start with the site name. Add the suburb. State the floor size. Say if the slab is new or old. List each coat to remove.
Note cracks and old patch work. Add the main use. State the look and grip you want. Share photos and plans with the same file names.
Ask each firm to price the same scope. Check what prep is in the price. Ask how edges are done. Ask how dust is kept down.
Check what clean-up is in the price. Ask what marks may stay. Check the finish and sheen. Ask when the floor can be used.
Check the scope
Read the full scope once. Then read it out loud. Mark each word that is not clear. Ask what it means on your site. Check the floor size.
Check the finish name. Check the edge work. Check the start and end points. Make sure each added task is shown.
Look for gaps as well. Who will move loose goods? Who will mask walls? Who will take out waste? Who will guard the fresh floor?
Who will give care notes? Ask how a new fault will be raised. Put each answer in writing. Keep the final copy with the quote.
Get the site ready
Clear loose goods from the room. Sweep up light waste. Keep the slab dry unless told not to. Mark pipes and cords near the work zone.
Keep pets away. Tell staff which path to use. Set keys and gate codes in time. Make sure the main contact can be reached.
Take a last set of photos. Check that the work zone can be seen. Point out fresh damage. Share any site change at once.
Do not wait for the crew to find it. A short site walk can save time. Use the scope as the walk list.
Both sides can then start from the same facts.
Check the work at handover
Use good light for the check. Walk each part of the floor. Look at edges and joins. Check the agreed sheen. Note any marks that need a talk.
Do not drag gear on the fresh floor. Ask when the room can be used. Get the care sheet before the team leaves.
Keep the quote, scope and care sheet. Add the finish name. Add the work date. Save the final photos. Note the clean product that was named.
Share the care plan with the people who clean the site. A small record now can make later care much more clear.
Care for the floor
Lift dust and grit often. Clean spills soon. Use the right mop or pad. Do not guess with a harsh product.
Test a new clean mix in one small spot. Put mats at busy doors. Use pads under chairs. Check wet zones with care.
Ask for help if the floor starts to change.
Set a short care plan. Name who will do each task. State how often it is done. Keep the right tools on site.
Check the floor at set times. Take a photo of any new mark. Act while the mark is small.
Good care is plain work done on a sound plan.
Keep the next step simple
You do not need every answer at once. Start with the facts you can see. Add the floor size. Add the site use. Add clear photos.
State the main goal. List the time and access needs. Then ask what else is needed. This gives the first call a useful and fair base.
For advice tied to your slab, ask Superfloor Australia to review your project details. Share the site, size, use and photos. The team can then ask clear next questions. Keep the final advice with the rest of your job file.