
Polished concrete floors look stunning, but getting that professional finish requires the right approach. At superfloor australia, we’ve seen too many DIY attempts fail because people skip critical preparation steps or use the wrong sealing method.
This guide walks you through how to seal and polish concrete properly, from surface prep to final protection. You’ll learn the exact techniques professionals use to achieve results that last.
Surface Preparation: The Foundation of Professional Results
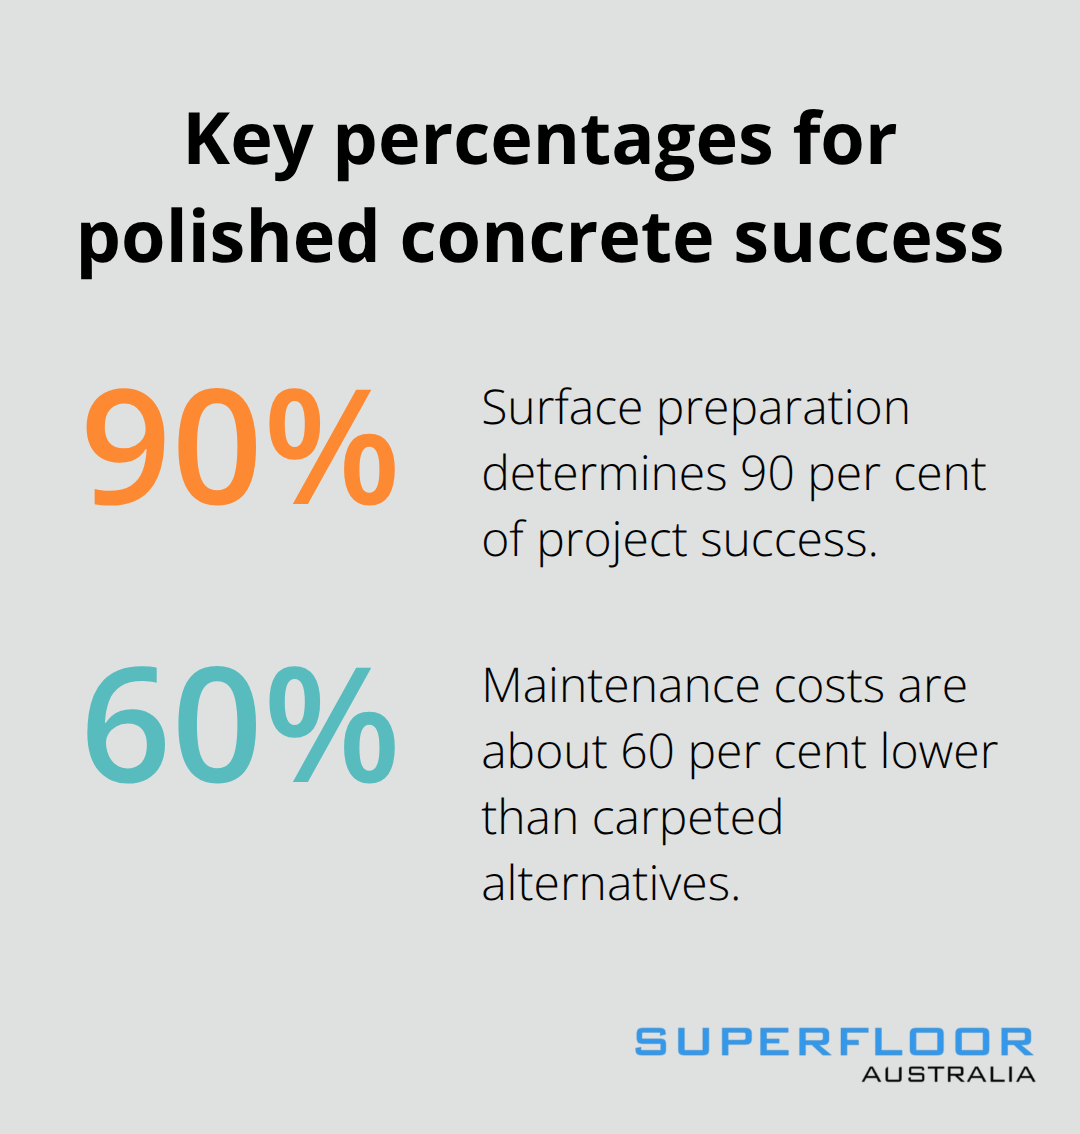
Surface preparation determines 90 per cent of project success, which means skipping this stage will reduce your finish durability significantly. Most DIY failures happen here, not during polishing. You need to remove every trace of existing coatings, adhesives, and sealers before touching diamond tools to concrete. Start with mechanical scraping to lift old paint or epoxy, then apply citrus-based solvents to stubborn patches and let them sit for 15 minutes before scraping again.
Test a small 3 by 3 foot area first to confirm your removal method works without damaging the underlying concrete.
Eliminate Contamination Before Polishing
Contamination like oil, paint residue, or adhesive creates weak spots where the sealer won’t bond properly, resulting in patchy finishes that fail within months. Water beading reveals contamination-drop water on suspect areas and watch if it beads up or spreads flat. Flat spreading indicates the concrete is contaminated and needs more aggressive cleaning before you proceed. This simple test prevents costly failures later in the project.
Address Cracks and Damage Immediately
Cracks wider than one-eighth inch require epoxy injection before any polishing happens. Fill them completely and allow 24 hours cure time before touching the surface. Smaller cracks and uneven areas get addressed through grinding for levelling, but you cannot polish over damage and expect it to disappear. Check your slab flatness with a 6-foot straightedge-gaps above 3 millimetres require corrective grinding before densifying.
Concrete strength matters significantly. Basic polishing needs minimum 25 MPa compressive strength, while premium finishes demand 32 megapascal or higher. Test softness with a nail (soft concrete scratches easily), a screwdriver (medium hardness resists scratching), and both tools together (hard concrete resists both). Concrete under 28 days old lacks sufficient strength for polishing, so plan your project timeline accordingly.
Test Moisture Before You Start Grinding
Moisture testing is essential before grinding starts. Use a calcium chloride test kit and watch for readings between 3 to 5 pounds per 1,000 square feet over 24 hours-if moisture levels exceed this range, you need moisture mitigation before proceeding. This step prevents sealer failure and surface damage that becomes expensive to repair.
Execute Grinding in Proper Sequences
Start with 25 to 30 grit metal-bonded diamonds to remove surface irregularities and prepare a uniform base. This aggressive first stage removes old coatings and levels the concrete. Progress systematically through 70 to 80 grit, then 100, 200, 400, 800, 1500, and finally 3000 grit resin pads. Skipping grit stages-jumping from 100 directly to 400, for example-creates permanent scratch marks that no final polish removes. Plan for 15 to 20 passes per 300 square metres at typical industry speeds.
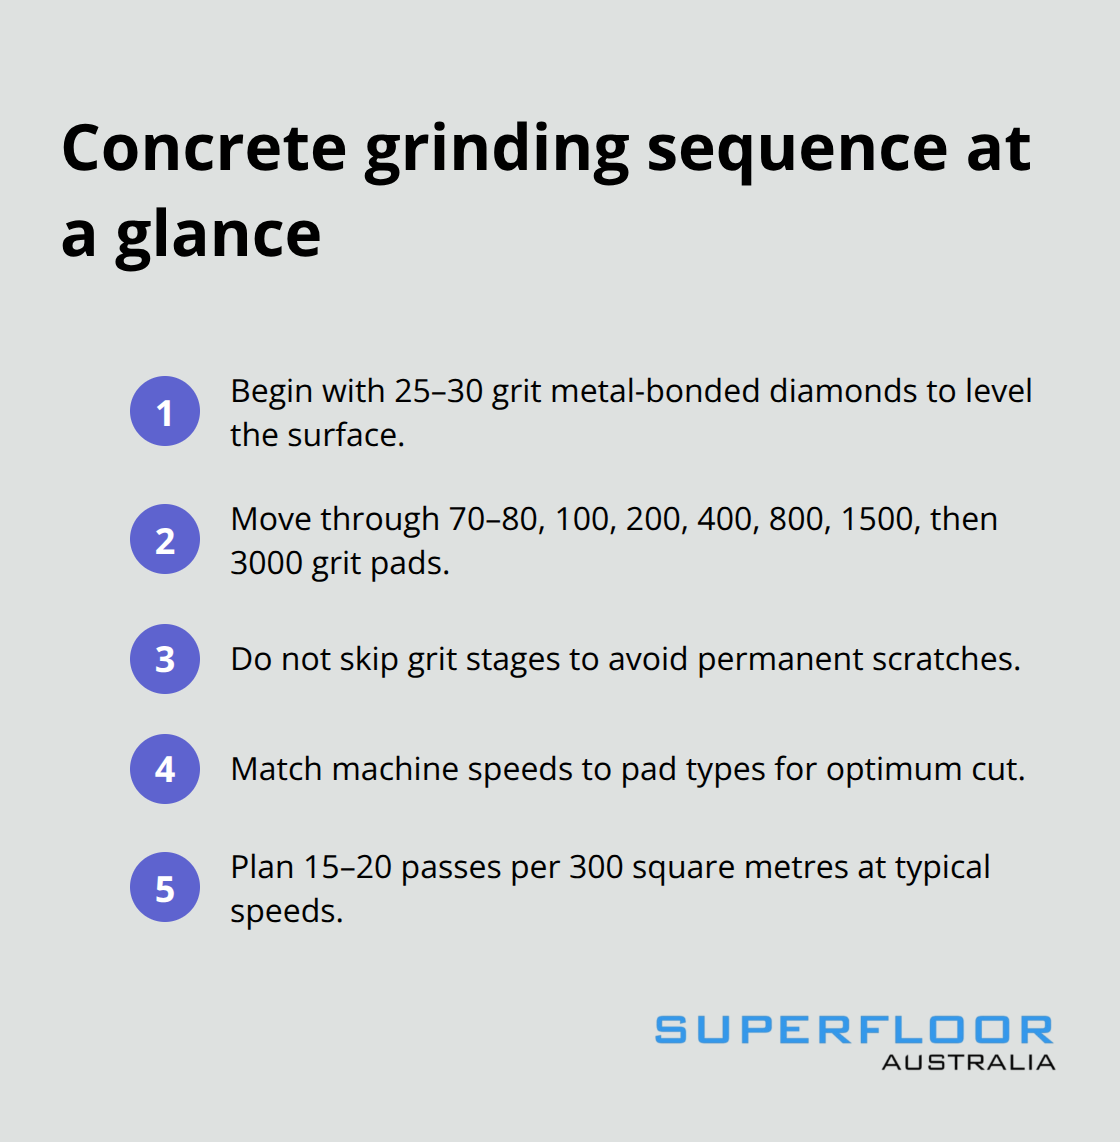
Choose equipment carefully. Floor grinders range from 13-inch single-disc machines to 27-inch planetary models. Variable-speed machines working at approximately 175 to 1750 RPM let you match each pad stage properly. Metal-bonded pads work best at 175 to 300 RPM, while resin pads need 600 to 1200 RPM. Avoid excessive machine speed and downward pressure, which burn pads and create heat damage that weakens the concrete surface.
Protect Your Health During Grinding
Dust control during grinding cannot be ignored. Follow silica dust guidelines with HEPA filtration capturing 99.97 per cent of particles above 0.3 microns and maintain minimum airflow of approximately 150 CFM. Wear N95 respirators, safety glasses, and hearing protection throughout grinding. Experienced operators can treat about 250 to 400 square metres per day depending on concrete hardness and desired finish. With your foundation properly prepared and ground, you’re ready to move into the polishing phase where diamond tools transform the surface into a reflective finish.
Polishing Techniques That Deliver Results
The grit sequence for concrete polishing you select determines whether your concrete ends up mirror-polished or permanently scratched. Diamond pads start at 30 grit for initial surface removal, then progress through 50, 100, 200 grit metal bonds, before switching to resin bonds at 400, 800, 1500, and higher grits. This progression matters more than most DIYers realise. Professional finishes require proper sequencing, and skipping stages creates scratches that no amount of final polishing removes. Grit selection directly affects your aggregate exposure-800 grit and above yields semi-gloss finishes, while 1500 and above produces that mirror-like gloss customers expect. Diamond tools deliver smoother, higher-quality finishes than conventional abrasives because they cut more uniformly across the concrete surface.
Match Machine Speed to Each Polishing Stage
Your machine speed matters significantly during polishing. Metal-bonded diamonds and resin-bonded pads excel at different stages-metal bonds excel at initial grinding stages, removing heavy scratches and levelling surfaces, while resin bond pads shine in later polishing phases. Variable-speed machines let you match each pad stage properly, and this flexibility prevents the common mistake of using one speed for all grits. Avoid the temptation to increase pressure or speed thinking you’ll finish faster-excessive downward force burns pads and creates heat damage that weakens the concrete permanently.
Maintain Consistent Pressure Throughout Polishing
Consistency separates professional results from amateur work. Each pass across the concrete should apply even downward pressure without grinding into low spots or feathering across high areas. Typical diamond pads cost between 45 and 65 dollars each and can cover 2000 to 4000 square metres with proper care, so store them dry and clean them after each use to maximise lifespan and maintain performance. Experienced operators treat about 250 to 400 square metres per day depending on concrete hardness and your desired finish level.
Choose Wet or Dry Polishing Methods
Dry polishing with continuous dust extraction has become the industry standard because it offers better speed and dust control. Dry polishing eliminates the wastewater handling that wet methods require, making it more practical for most projects. This approach also prevents moisture from interfering with sealer adhesion later in the process.
Apply Sealer While the Surface Remains Warm
Apply penetrating sealers immediately after your final polishing while the surface is still warm-this timing improves adhesion significantly. Use a microfibre applicator and plan for about 10 to 20 square metres per litre coverage. Uneven sheen or blotchy results indicate poor sealer application or incompatible products, so test your sealer on a small area first before committing to the full floor. With your polished surface complete and sealed, the next phase focuses on protecting that finish through proper sealing methods and long-term maintenance strategies.
Sealing and Protecting Your Polished Concrete Floor
Sealing polished concrete is not optional-it is the difference between a floor that looks stunning for decades and one that stains, fades, and fails within years. The sealer you select determines how your floor resists stains, moisture, and daily wear, so this decision matters more than most people realise.
Choose the Right Sealer Type for Your Space
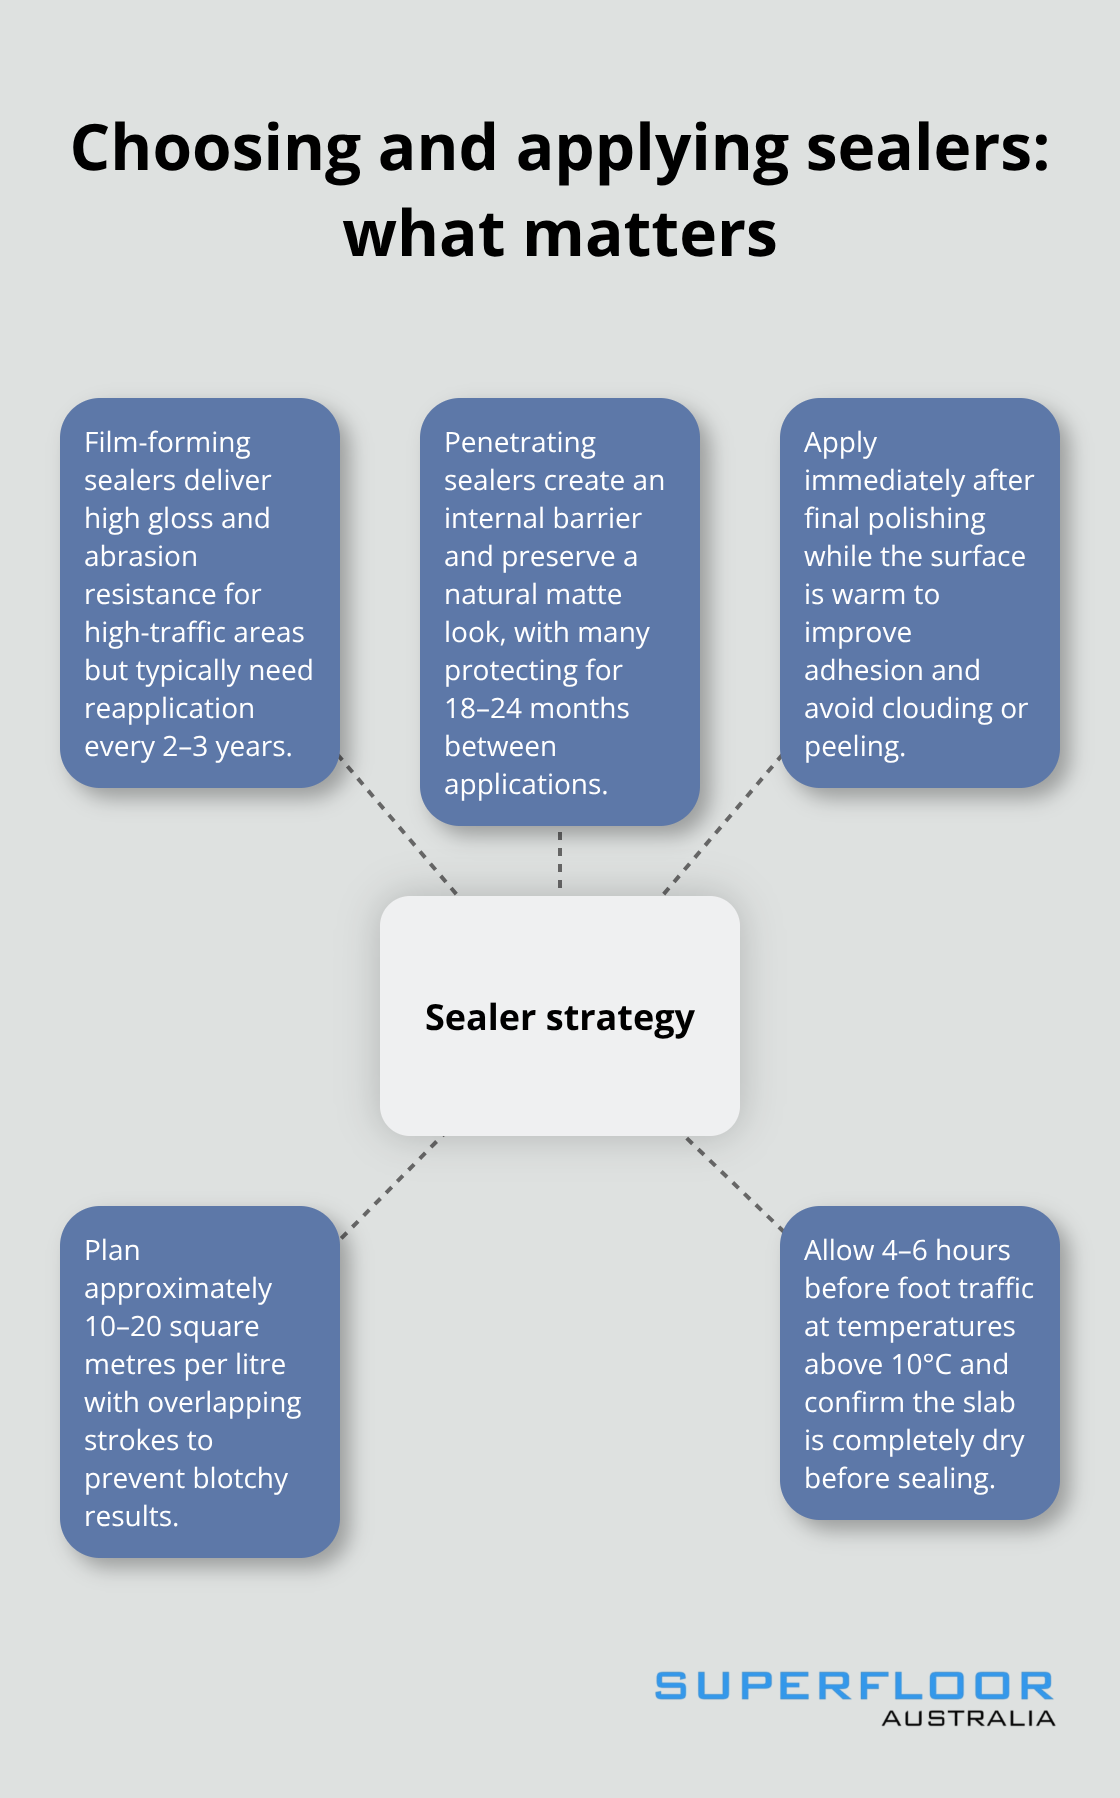
Film-forming sealers like acrylics, epoxies, and polyurethanes sit on top of the concrete and deliver that wet, glossy appearance that makes polished floors so visually striking. These sealers provide strong stain and abrasion resistance, making them ideal for high-traffic commercial spaces where you want maximum visual impact. However, film-forming sealers require reapplication every 2 to 3 years because foot traffic gradually wears through the protective layer.
Penetrating sealers such as silane, siloxane, and lithium-based products work differently-they penetrate into the concrete to form a chemical barrier from within. These sealers preserve the natural matte appearance of polished concrete and last significantly longer, with many penetrating products maintaining protection for 18 to 24 months between applications. This dual-sealer strategy combines the durability of penetrating products with the aesthetic benefits of film-forming sealers.
Apply Sealer with Proper Timing and Technique
Timing and technique determine whether your sealer bonds properly or fails prematurely. Apply penetrating sealers immediately after final polishing while the concrete surface remains warm-this timing dramatically improves adhesion and prevents the clouding or peeling that occurs when you seal cold surfaces. Use a microfibre applicator and plan coverage of approximately 10 to 20 square metres per litre, working in overlapping strokes to avoid uneven sheen or blotchy results.
Verify that concrete is completely dry before sealing (water should bead on the surface rather than spread flat). Allow 4 to 6 hours curing time at temperatures above 10 degrees Celsius before allowing foot traffic. Test your sealer on a small area first to confirm compatibility with your polished surface.
Maintain Your Sealed Floor for Long-Term Protection
Regular sweeping and occasional damp mopping with pH-neutral cleaners keep sealed polished concrete in excellent condition. Avoid harsh chemicals and acidic cleaners that degrade sealer integrity, and wipe spills promptly to prevent staining. Protect the surface with rugs or mats in high-traffic zones, and use felt pads under furniture to prevent scratching.
Monitor water beading on your sealed floor periodically; when water stops beading and spreads flat across the surface, resealing is warranted. Topical sealers generally require renewal every 3-7 years, depending on traffic and exposure conditions. Properly sealed and maintained polished concrete can last 25 years or longer, with maintenance costs running about 60 per cent lower than carpeted alternatives, making this investment far more cost-effective than other flooring options over time.
Final Thoughts
Professional polished concrete results depend on three non-negotiable elements: meticulous surface preparation, proper equipment and technique during polishing, and correct sealer selection and application. Surface preparation determines 90 per cent of your success, which means investing time to remove contaminants, fill cracks, and test moisture levels prevents costly failures later. During polishing, match your machine speed to each grit stage, maintain consistent pressure throughout every pass, and never skip grit sequences thinking you’ll save time-this approach to how to seal and polish concrete separates professionals from DIYers.
Common mistakes derail most DIY attempts and cost thousands in repairs. Jumping between grit stages creates permanent scratches that no final polish removes, while inadequate dust extraction prevents proper sealer adhesion and creates health hazards. Excessive machine speed or pressure burns pads and weakens the concrete surface, and sealing cold or contaminated surfaces leads to clouding, peeling, and patchy finishes within months.
For projects exceeding 500 square metres or when safety codes require certified dust extraction, professional execution makes financial sense. We at superfloor australia deliver precision preparation and expert craftsmanship across Brisbane, handling everything from residential kitchens to large commercial installations. Contact superfloor australia to discuss your project and get professional guidance tailored to your specific needs.