
Most Brisbane businesses skip surface preparation and pay for it later with cracked, uneven floors that fail within years. The concrete underneath your polished finish is everything-poor prep work guarantees poor results, no matter how skilled the polishing team is.
At Superfloor Australia, we’ve seen firsthand how rushing through Brisbane floor prep services costs businesses thousands in repairs and replacements. This guide shows you exactly what proper preparation looks like and why it’s the difference between a floor that lasts decades and one that deteriorates in months.
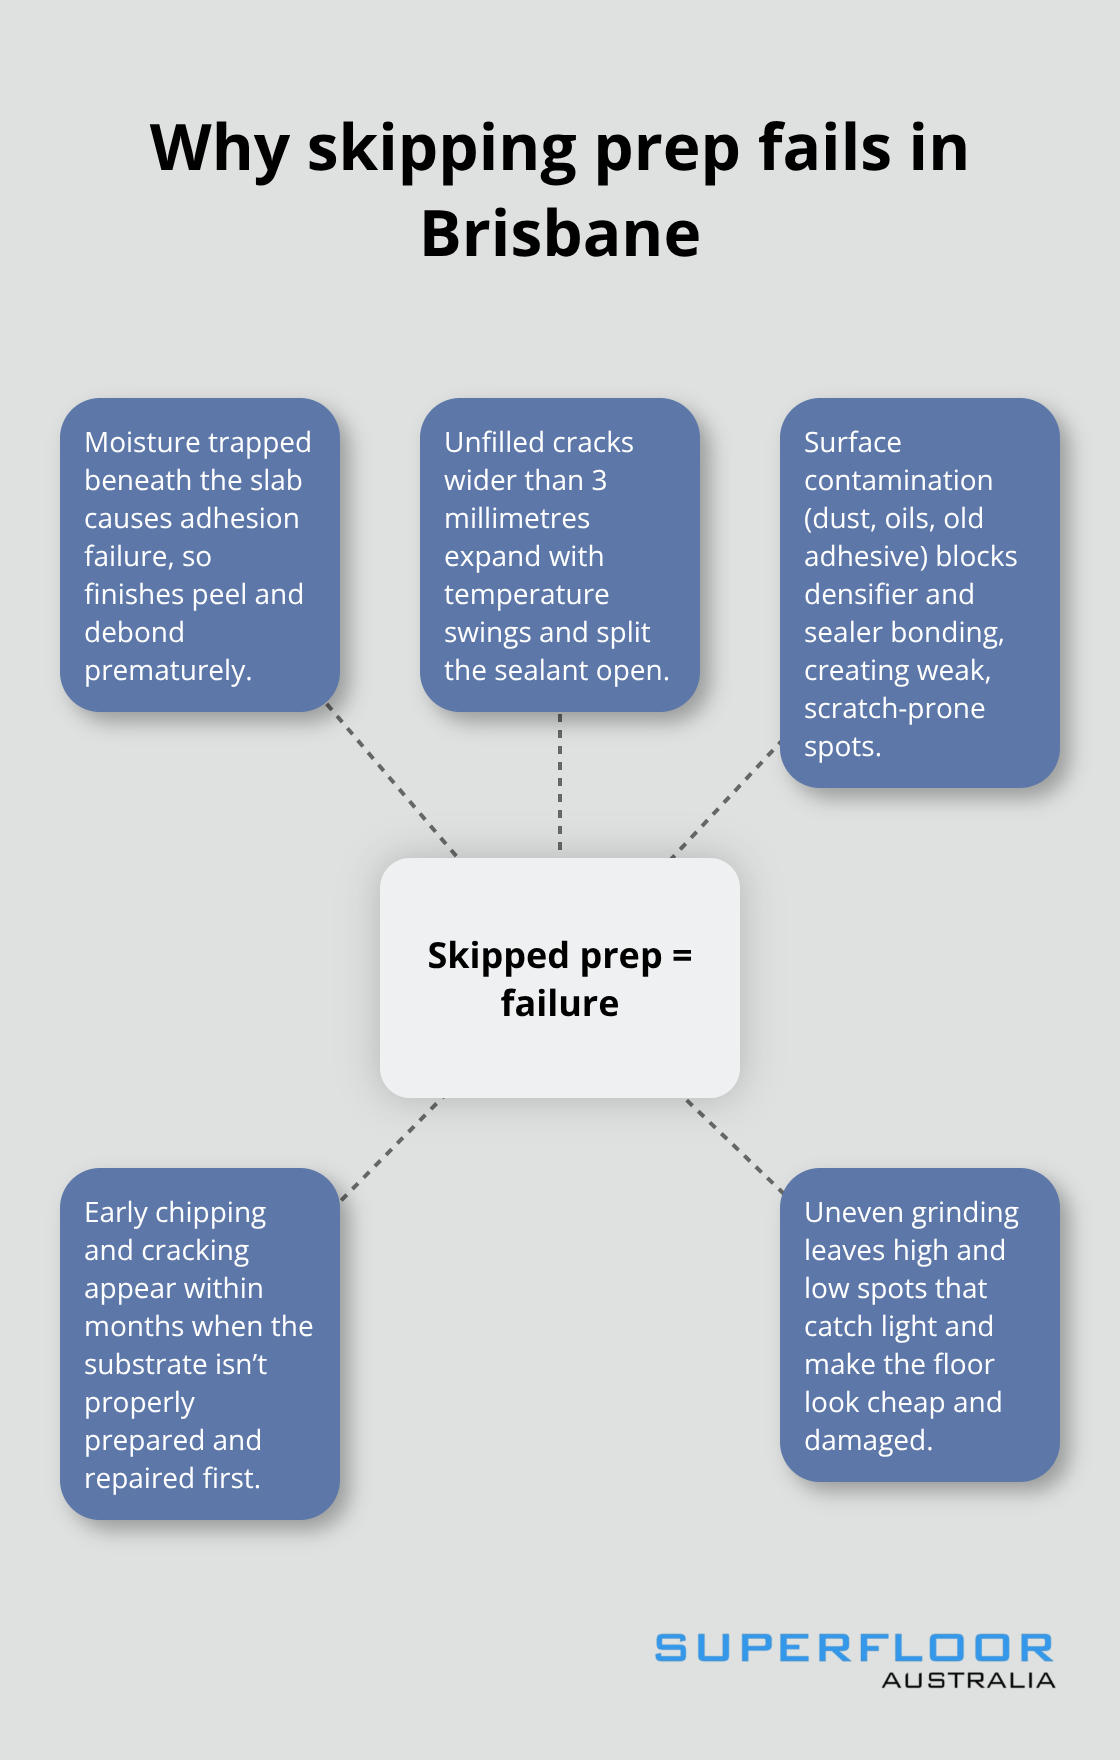
What Happens When You Skip Surface Preparation
Concrete that hasn’t been properly prepared before polishing will crack, chip, and fail within months, regardless of how skilled your polishing team is. Moisture trapped beneath the surface causes adhesion failure, leaving your polished finish peeling away. Uneven grinding creates high spots and low spots that catch light unevenly, making the floor look cheap and damaged. Cracks wider than 3mm that aren’t epoxy-filled before polishing will expand during temperature changes and split the sealant open. Contamination like dust, oils, or old adhesive left on the concrete prevents the densifier and sealer from bonding properly, leading to weak spots that scratch and wear through faster than the rest of the floor.
Concrete Age and Strength Determine Polishing Success
Your concrete must reach at least 25 MPa compressive strength before polishing, and 32 MPa or higher for premium finishes. Concrete under 28 days old simply lacks the strength to handle the grinding and polishing process without surface degradation. Moisture testing using a calcium chloride kit is non-negotiable before you start any prep work-if readings exceed 3 to 5 pounds per 1,000 square feet over 24 hours, moisture mitigation must happen first or your floor will fail. A water drop test on the concrete checks for contamination: if water beads up, the surface needs thorough cleaning before prep starts. A properly prepared and sealed concrete floor lasts 10 to 15 years or longer in residential settings, while poorly prepped floors deteriorate within 2 to 3 years.
Equipment Selection Separates Professional Results from Failures
Stripping old coatings requires aggressive 25 to 30 grit metal-bonded diamonds on a heavy machine, with passes at 90-degree angles to expose fresh concrete completely. Smaller handheld 125mm grinders work for tight spots, but they cannot replace a full-size floor grinder for main areas. After grinding, a lithium silicate densifier must be applied liberally and kept wet for 30 to 60 minutes to penetrate deep and close the concrete pores properly.
The Grit Sequence Cannot Be Rushed
Each grit stage-starting at 25/30, moving through 70/80, then 100, 200, 400, 800, 1500, and finally 3000-removes the scratches from the previous step. Skipping from 400 grit straight to 3000 grit leaves permanent scratches that no amount of sealing hides. Dry polishing with continuous dust extraction is faster and preferred by most Australian professionals, covering 250 to 400 square metres per day. Wet polishing reduces heat and extends pad life but requires water management that slows the job down.
Sealer Selection Impacts Long-Term Performance
Penetrating sealers last longer and resist oil and water penetration better than film-forming sealers, typically covering 10 to 20 square metres per litre with 4 to 6 hours of cure time above 10 degrees Celsius. The sealer you choose determines whether your floor maintains its finish for years or requires frequent reapplication. Brisbane businesses that invest in the right sealer protect their investment and avoid costly maintenance cycles. The next section covers the common mistakes that undo all this preparation work.
How We Assess and Prepare Your Concrete
Testing Concrete Strength and Moisture
We start every Brisbane floor prep job with a concrete assessment that determines whether your slab is ready for polishing or needs remedial work first. Your concrete must reach at least 25 MPa compressive strength, and we test this before touching the surface. A calcium chloride moisture test tells us if trapped water will sabotage your finish-readings above 3 to 5 pounds per 1,000 square feet mean moisture mitigation comes before any grinding happens. We perform a water drop test on the surface to identify contamination like dust, oils, or old adhesive that prevents densifiers from bonding. These tests take a few hours but save months of floor failure down the line.
Managing Cracks and Surface Damage
Cracks wider than 3 millimetres require epoxy filling with a 24-hour cure before prep starts, because temperature changes will split unsealed cracks and destroy your sealant. Smaller cracks under 3 millimetres often close during the densification process, so we leave those alone and monitor them. Once we confirm the concrete is sound and dry, we map out the grinding strategy based on what coatings or damage need removal.
The Grinding Process and Equipment Selection
Grinding starts aggressive with 25 to 30 grit metal-bonded diamonds on a heavy machine, running passes at 90-degree angles to strip old coatings and expose fresh concrete completely. We use dry polishing with continuous dust extraction because it covers 250 to 400 square metres per day and keeps the site cleaner than wet methods. For tight spots where a full-size grinder cannot reach, we deploy a handheld 125 millimetre surface grinder to finish edges and corners properly.
Progressive Grit Stages and Densification
Each subsequent grit stage-70/80, then 100, 200, 400, 800, 1500, and finally 3000-removes scratches from the previous step, and skipping stages leaves permanent marks that no sealer hides. We apply lithium silicate densifier liberally after grinding and allow 24–48 hours for the densifier to react fully before polishing. Penetrating sealers go down last because they last longer and resist oil and water penetration better than film-forming alternatives, covering 10 to 20 square metres per litre with 4 to 6 hours of cure time above 10 degrees Celsius.
What Happens Next in Your Project
This sequence-test, grind, densify, seal-creates the foundation for floors that perform, but the final result depends on what finish you want and how you maintain the surface after installation. The next section covers the common mistakes that undo all this preparation work and how to avoid them.
Where Brisbane Businesses Lose Thousands in Floor Prep
Speed Destroys Preparation Quality
Speed kills floor preparation. Brisbane businesses compress a two-week prep schedule into four days, then spend the next two years dealing with peeling sealers, uneven finishes, and stress fractures that destroy their investment. Preparation that moves too fast skips critical testing phases that reveal moisture problems, inadequate concrete strength, or contamination that will sabotage your finish before polishing even starts. A calcium chloride moisture test alone takes 24 hours to complete properly, yet impatient businesses skip it entirely and discover trapped water only after their floor fails.
Concrete strength testing requires time too-you cannot assume a five-year-old slab is ready for polishing without verification. The grit sequence cannot be compressed either. Each stage from 25/30 grit through to 3000 grit demands proper passes and inspection to remove scratches from the previous step. Jumping stages to save time leaves permanent marks that no sealer hides, and you cannot sand those out later without starting the entire process over. Projects that tried to save three days lost six months to repairs.
The grinding itself takes 250 to 400 square metres per day with dry polishing methods-that is the realistic pace. Cutting corners here produces visible swirl marks, uneven stone exposure, and a finish that looks rushed and cheap.
Cracks and Damage Expand Into Expensive Failures
Damage and cracks ignored during prep become expensive failures after polishing. Cracks wider than 3 millimetres require epoxy filling with a full 24-hour cure before any grinding touches the concrete, because temperature changes will split unsealed cracks and fracture your sealant apart. Small cracks under 3 millimetres often close during densification, so you can leave those alone, but you must identify which cracks fall into which category through proper assessment.
Spalling concrete, soft spots, and delamination are red flags that demand repair or removal before prep proceeds-these defects expand under the pressure of grinding equipment and create weak zones that fail within months. Old adhesive residue, paint, or epoxy coating left on the surface prevents your densifier and sealer from bonding properly, creating weak spots that scratch and wear through faster than surrounding areas. Contamination from dust, oils, or concrete sealers shows up in a water drop test-if water beads on the surface instead of spreading, you have contamination that needs chemical cleaning before prep starts. Many Brisbane businesses skip this test and discover the problem only after their sealer peels away.
Inadequate Equipment Guarantees Substandard Results
Equipment inadequacy compounds all these mistakes. A full-size heavy-duty grinder with 25 to 30 grit metal-bonded diamonds is non-negotiable for stripping old coatings and exposing fresh concrete. Small handheld grinders cannot deliver the weight and power needed for aggressive stripping, and using them for main areas produces uneven grinding and incomplete coating removal.
Diamond pads cost 45 to 65 dollars each and cover 2,000 to 4,000 square metres with proper maintenance, so cheap equipment that burns through pads faster wastes money and extends timelines. Lithium silicate densifier must penetrate deep into the concrete pores while the surface stays wet-this cannot be rushed or skipped, and inadequate densification leaves the concrete vulnerable to staining and moisture damage. Hiring professional-grade equipment from a specialist supplier ensures you have the right tools for each stage, avoiding the false economy of budget equipment that fails mid-project or delivers substandard results.
Final Thoughts
Proper surface preparation separates floors that last decades from those that fail within years. Every test, every grit stage, and every application of densifier matters because concrete performs only as well as the foundation beneath your polished finish. Brisbane businesses that rush through prep work or ignore damage end up spending thousands on repairs and replacements that proper preparation prevents from the start.
We at Superfloor Australia handle every step of Brisbane floor prep services with precision because we know that skipping or shortcutting any phase guarantees failure. Our concrete testing identifies moisture problems and strength issues before grinding starts, our grinding follows the proper grit sequence without compression, and our densification penetrates deep to protect your investment for years (whether your project is residential, commercial, or industrial). This methodical approach costs more upfront than rushing, but it costs far less than dealing with peeling sealers, uneven finishes, and structural failures down the line.
Contact Superfloor Australia to discuss your floor prep needs and receive a precise plan tailored to your concrete condition and finish goals. We deliver the preparation quality that makes polished concrete worth the investment.