At Superfloor Australia, we know that achieving superbly polished floors is both an art and a science.
A flawlessly polished floor can transform any space, enhancing its aesthetics and increasing its value.
In this guide, we’ll share our expert insights on how to create stunning, mirror-like surfaces that will leave a lasting impression.
How to Prepare Your Floor for Polishing
Assessing and Cleaning the Surface
The foundation of a superbly polished floor starts with meticulous preparation. Inspect your floor thoroughly for oil stains, paint splatters, or adhesive residues. These contaminants can interfere with the polishing process and compromise the final finish. Use a degreaser for oil stains and a scraper for stubborn residues. For concrete floors, vinegar can be used as a powerful, natural cleaning agent to cut through dirt and grime without leaving streaks.
Give your floor a deep clean next. Use a high-powered vacuum to remove loose debris, then mop thoroughly. For tougher grime, a floor scrubber with a soft brush attachment can work wonders. This step is vital – any remaining dirt can scratch the surface during polishing.
Addressing Imperfections
Tackle any cracks, chips, or uneven areas. For concrete floors, use a patching compound designed for the specific type of damage. Fill small cracks with a concrete crack filler, while larger ones may require a two-part epoxy. Wood floors might need wood filler or even board replacement for severe damage.
Allow ample time for repairs to cure fully (this can take anywhere from a few hours to a few days, depending on the product used). Once cured, sand the repaired areas to ensure they’re level with the surrounding floor.
Creating a Level Surface
A level surface is essential for achieving an even polish. Use a long straightedge to check for any high or low spots across your floor. For concrete, grind down high spots and fill low areas with a self-levelling compound to create a smooth canvas for polishing.
For wooden floors, sanding typically levels the surface best. Start with coarse-grit sandpaper to remove major imperfections, then progress to finer grits for a smooth finish. Always sand in the direction of the wood grain to avoid visible scratches.
Selecting the Right Tools
The right tools can make a significant difference in your floor preparation. For concrete floors, a diamond grinder can effectively remove old coatings and level the surface. For wood floors, a drum sander works well for large areas, while an edge sander helps reach corners and edges.
Don’t forget safety equipment. Wear protective goggles, a dust mask, and ear protection when operating power tools. (Your health is just as important as the floor’s condition!)
Final Cleaning
After addressing imperfections and levelling the surface, perform a final clean. Use a tack cloth to remove any remaining dust particles. For larger areas, a microfibre mop can effectively trap fine dust. This final cleaning ensures no debris interferes with the polishing process.
With your floor now properly prepared, you’re ready to move on to the next exciting step: choosing the right polishing equipment and materials to bring out your floor’s true potential.
What Equipment Do You Need for Floor Polishing?
Floor Polishers: The Core of Your Operation
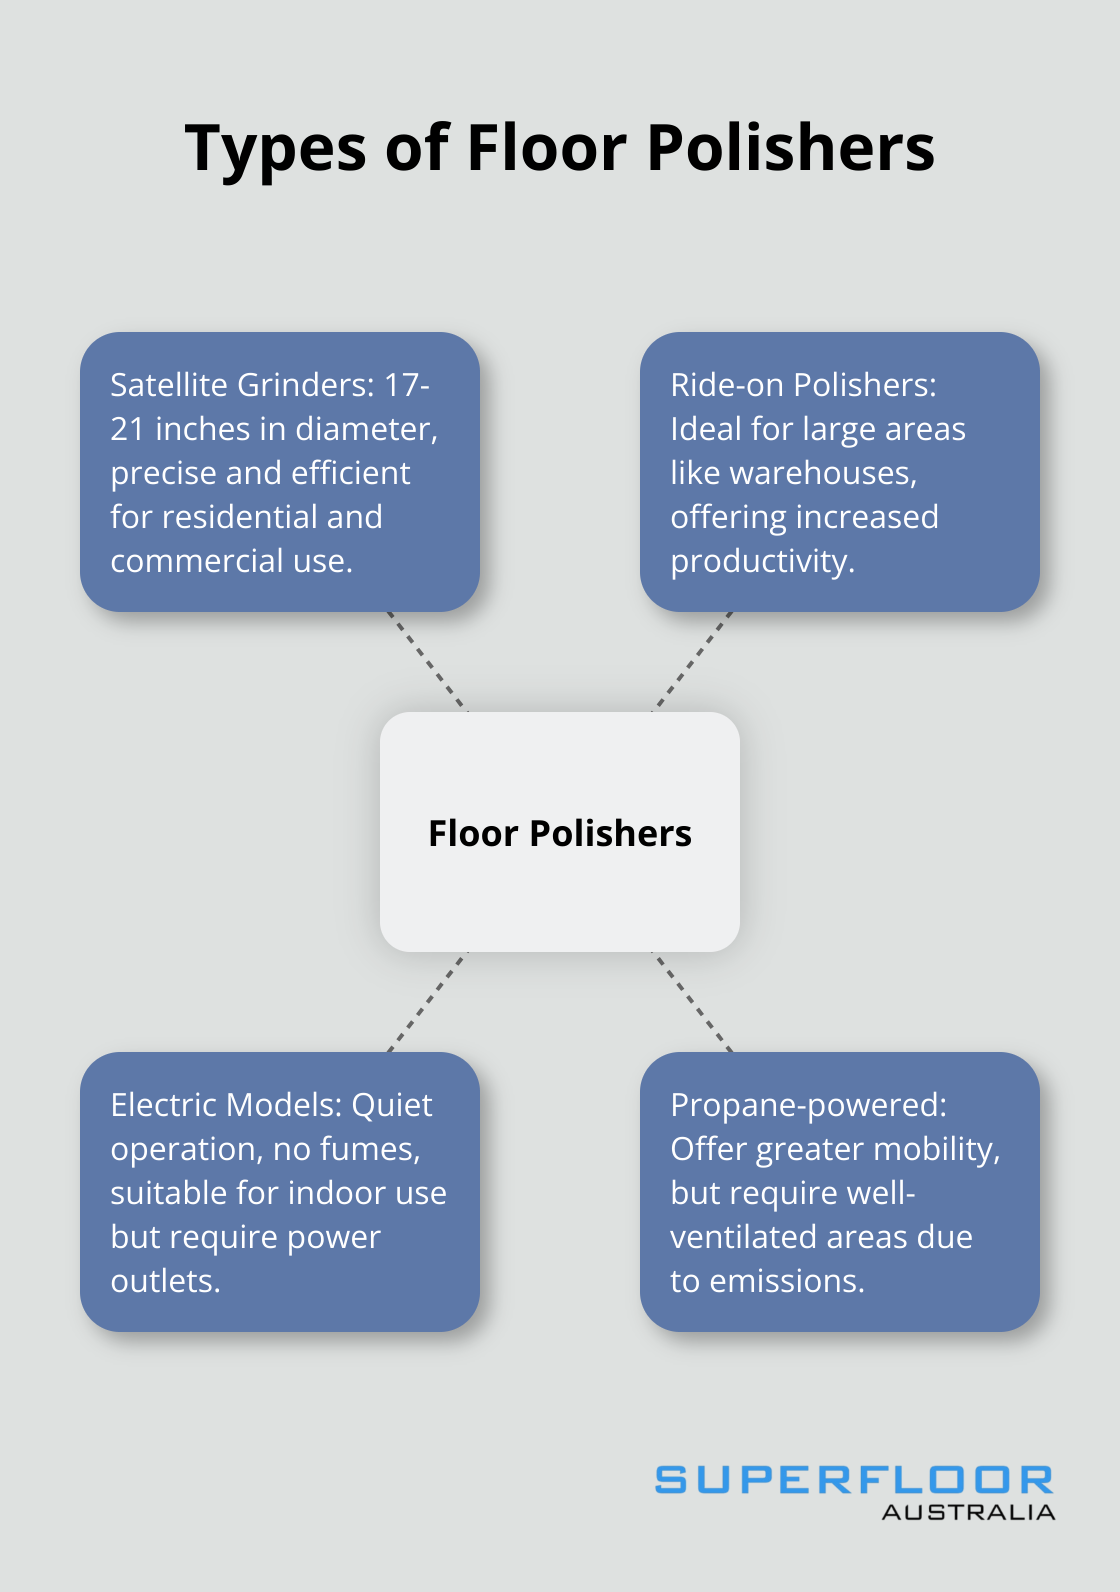
The foundation of any floor polishing job is the polisher. Satellite grinders and polishers are designed to deliver precision, efficiency and durability for both residential and commercial projects. These machines come in various sizes, typically 17 to 21 inches in diameter. Larger models cover more ground quickly but can prove challenging to manoeuvre in tight spaces.
For larger areas or industrial applications, ride-on polishers offer increased productivity. These machines allow operators to cover vast expanses of flooring efficiently, making them ideal for warehouses or large retail spaces.
When you select a polisher, consider the power source. Electric models operate quietly and emit no fumes, making them suitable for indoor use. However, they require access to power outlets. Propane-powered polishers offer greater mobility but should only operate in well-ventilated areas due to emissions.
Abrasives and Polishing Pads: Your Path to a Smooth Finish
The choice of abrasives and polishing pads can determine the success of your polishing project. Start with coarser grits to remove imperfections and progressively move to finer grits for a smoother finish. For concrete floors, diamond abrasives stand out as the top choice. They come in a range of grits, typically from 30 to 3000.
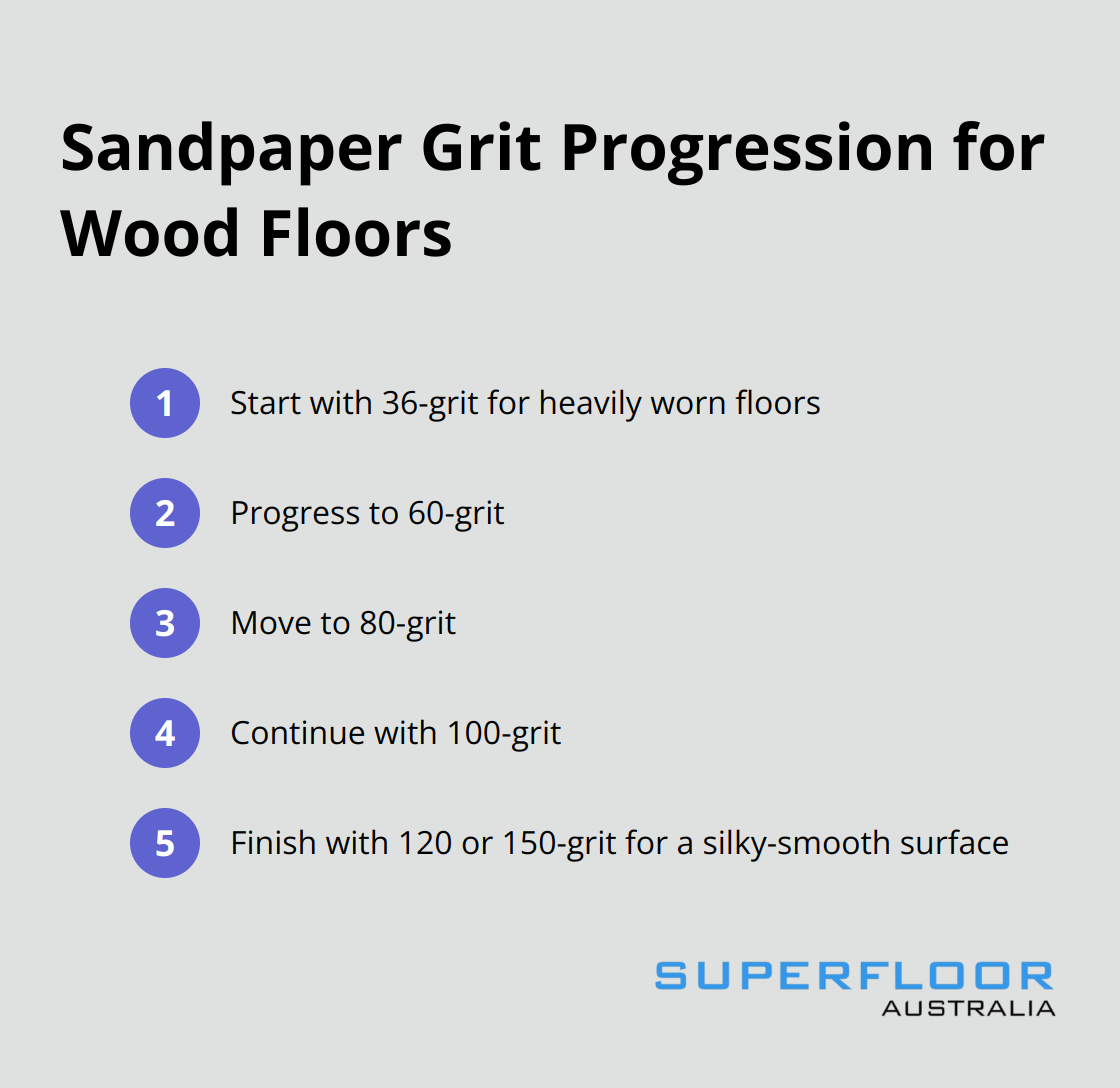
For wood floors, sandpaper is the primary abrasive. Begin with 36-grit paper for heavily worn floors, progress through 60, 80, and 100 grits before finishing with 120 or 150 grit for a silky-smooth surface.
Polishing pads come in various materials, each suited to different stages of the process. Resin-bond diamond pads excel on concrete, while softer pads (made from natural hair or synthetic fibres) work well on wood and softer stone surfaces.
Chemical Treatments: Boost Shine and Durability
While mechanical polishing can achieve a high shine, chemical treatments can elevate your floor’s appearance and durability. For concrete floors, densifiers are an essential step, helping to achieve a deeper, more lustrous sheen.
Stain guards are another essential treatment. They protect the polished surface from oil, water, and other contaminants, making the floor easier to maintain. For wood floors, penetrating oils can enhance the natural beauty of the grain while providing protection.
When you select chemical treatments, always consider the specific needs of your floor type and the level of traffic it will endure. High-traffic commercial spaces may require more robust treatments compared to residential areas.
The key to successful floor polishing lies not just in having the right equipment, but in knowing how to use it effectively. Proper technique and a systematic approach are just as important as the tools themselves. In the next section, we’ll explore the step-by-step process of polishing different floor materials to achieve that coveted high-gloss finish.
How to Polish Different Floor Types
Concrete Floor Polishing
Concrete polishing transforms dull surfaces into stunning, mirror-like finishes. Start with a 30-grit diamond pad to remove coatings and level the surface. Progress through finer grits: 100, 200, and continue to higher grits for the desired finish. Clean the floor thoroughly between each step to remove dust and debris.
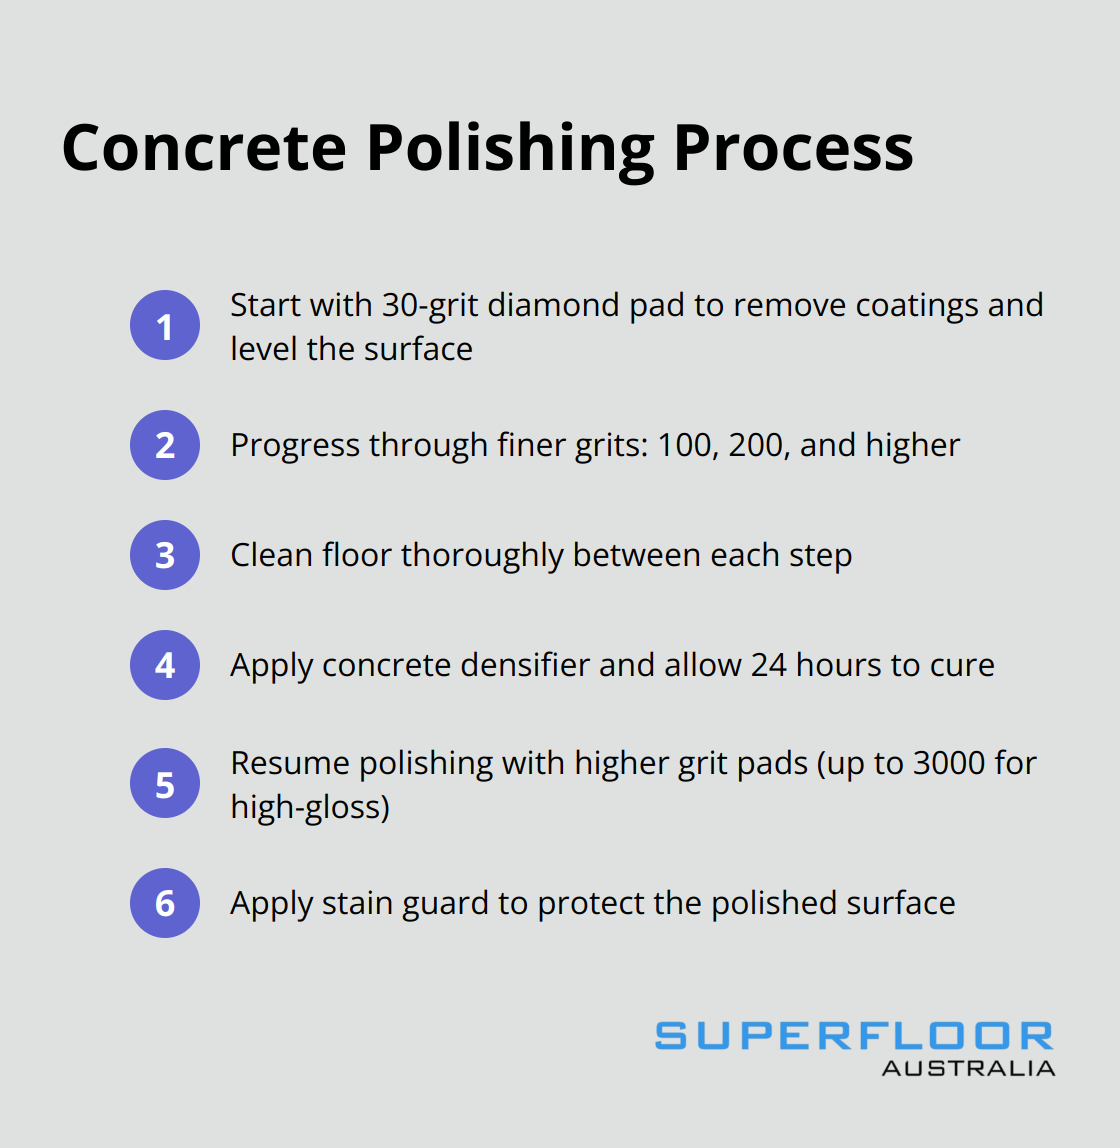
After initial grinding, apply a concrete densifier. This treatment penetrates the concrete, increasing hardness and providing better stain resistance. Allow at least 24 hours for the densifier to cure before continuing.
Resume polishing with higher grit pads. For a matte finish, stop at 400 grit. For high-gloss shine, continue up to 3000 grit. Finish by applying a stain guard to protect your newly polished surface.
Wood Floor Polishing
Wood floor polishing requires a gentler approach. Begin by sanding the floor with 36-grit sandpaper to remove old finishes and level the surface. Move through 60, 80, and 100 grit papers, always sanding in the wood grain direction.
Apply wood filler to gaps or cracks after sanding. Once dry, sand again with 120-grit paper for a smooth finish. Clean thoroughly to remove all dust.
Next, apply your chosen finish (penetrating oil for a natural look or polyurethane for durability). Use a lambswool applicator to apply thin, even coats. Allow each coat to dry completely before lightly sanding with 220-grit paper and applying the next coat. Most floors need 2-3 coats for optimal protection.
Stone Floor Polishing
Stone floors (such as marble or granite) require specialised techniques. Use a 50-grit diamond pad to remove any lippage (unevenness between tiles). Progress through 100, 200, 400, and 800 grit pads, cleaning thoroughly between each step.
After the 800 grit, apply a stone sealer to protect the porous surface. The sealant helps to protect against scratches and scuffs, ensuring that the stone retains its polished look and smooth finish. Once the sealer cures, continue polishing with 1500 and 3000 grit pads for a mirror-like finish.
For softer stones like limestone, use a gentler progression of grits and avoid over-polishing, which can damage the surface.
Tips for Successful Floor Polishing
Patience and attention to detail are key factors in achieving a superior finish. Rushing through steps or skipping grits will result in subpar results. Always test your process on a small, inconspicuous area first to ensure you achieve the desired outcome.
While DIY polishing is possible, professional services can provide superior results, especially for large or complex projects. Their expertise ensures a flawless finish that will enhance your space for years to come.
Equipment Selection
Choose the right equipment for your specific floor type. For concrete, a heavy-duty grinder with diamond pads works best. Wood floors require a drum sander for large areas and an edge sander for corners. Stone polishing often involves specialised machines with variable speed settings.
Don’t forget safety gear: wear protective goggles, a dust mask, and ear protection when operating power tools.
Final Thoughts
Superbly polished floors transform dull surfaces into stunning showpieces that elevate any space. The process demands careful preparation, appropriate tools, and expert techniques for different floor types (concrete, wood, or stone). Polished floors offer increased durability, easier maintenance, and enhanced resistance to stains and scratches.
Regular upkeep preserves the mirror-like finish of polished floors. A consistent cleaning routine, prompt spill management, and periodic professional touch-ups maintain their lustrous appearance. These practices ensure that polished floors continue to impress and add value to both residential and commercial spaces for years to come.
We at Superfloor Australia offer expert polished concrete flooring services in Brisbane. Our team specialises in high-quality results for residential, commercial, and industrial spaces. Professional services often yield superior outcomes, especially for large or complex projects, resulting in floors that captivate and impress.