Choosing the right concrete polishing discs can make or break your flooring project. At Superfloor Australia, we understand the importance of selecting the best tools for the job.
This guide will walk you through the key factors to consider when choosing concrete polishing discs, ensuring you achieve the perfect finish for your concrete floors.
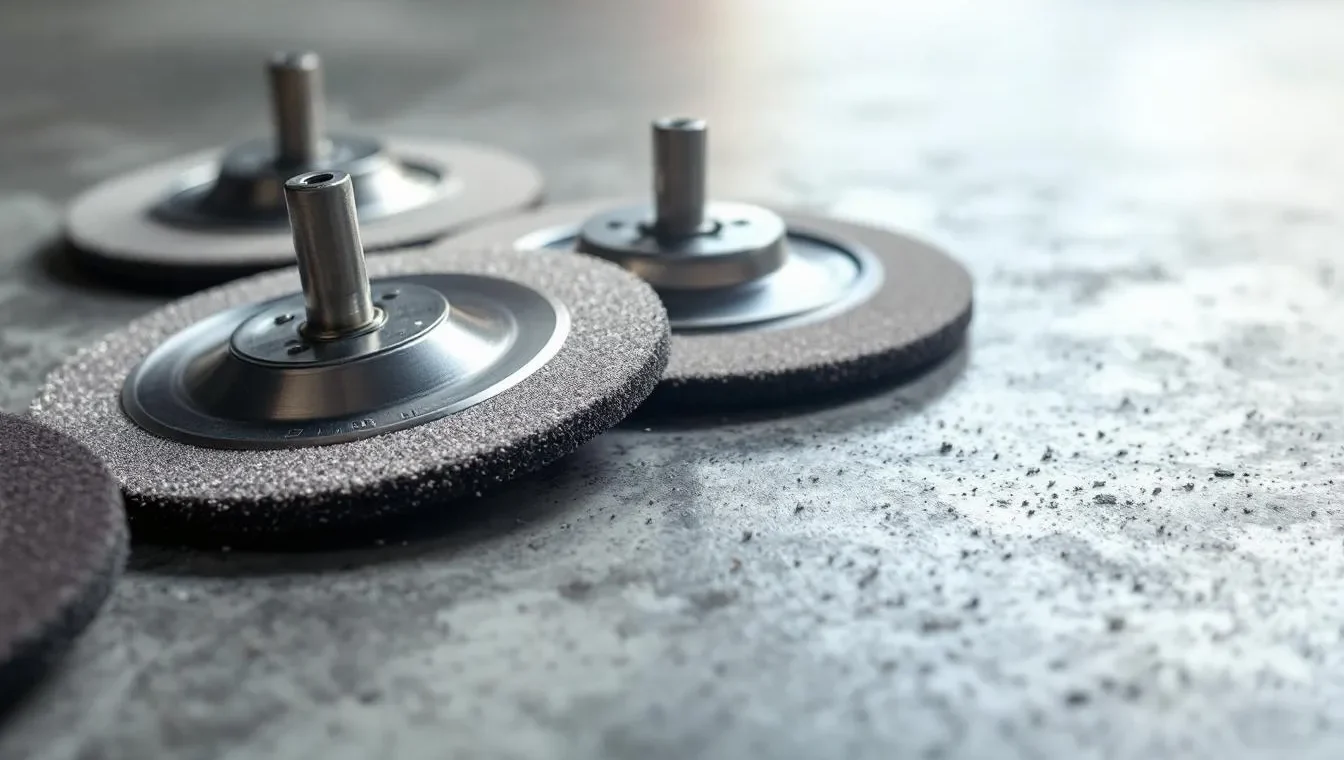
What Are Concrete Polishing Discs?
Concrete polishing discs transform rough concrete surfaces into smooth, glossy floors. These essential tools come in various types, each designed for specific stages of the polishing process.
Types of Polishing Discs
Metal-bonded diamond discs excel in the initial grinding stages. Their aggressive nature removes major imperfections and levels the concrete surface. Resin-bonded diamond discs follow, refining the surface and preparing it for the final polish. Hybrid discs (combining metal and resin bonds) offer a balance between aggressive cutting and fine polishing.
Materials and Construction
The quality of materials in polishing discs significantly affects their performance. High-grade diamonds provide effective cutting and longevity. According to a recent study by the American Concrete Institute, using the appropriate diamond size can increase grinding efficiency by 30%.
The binding material holding the diamonds plays an equally important role. Ceramic binders offer excellent durability, especially when polishing abrasive materials like concrete. Binder hardness is important. A binder that’s too soft will wear away quickly when processing an abrasive material like concrete.
Grit Levels and Their Impact
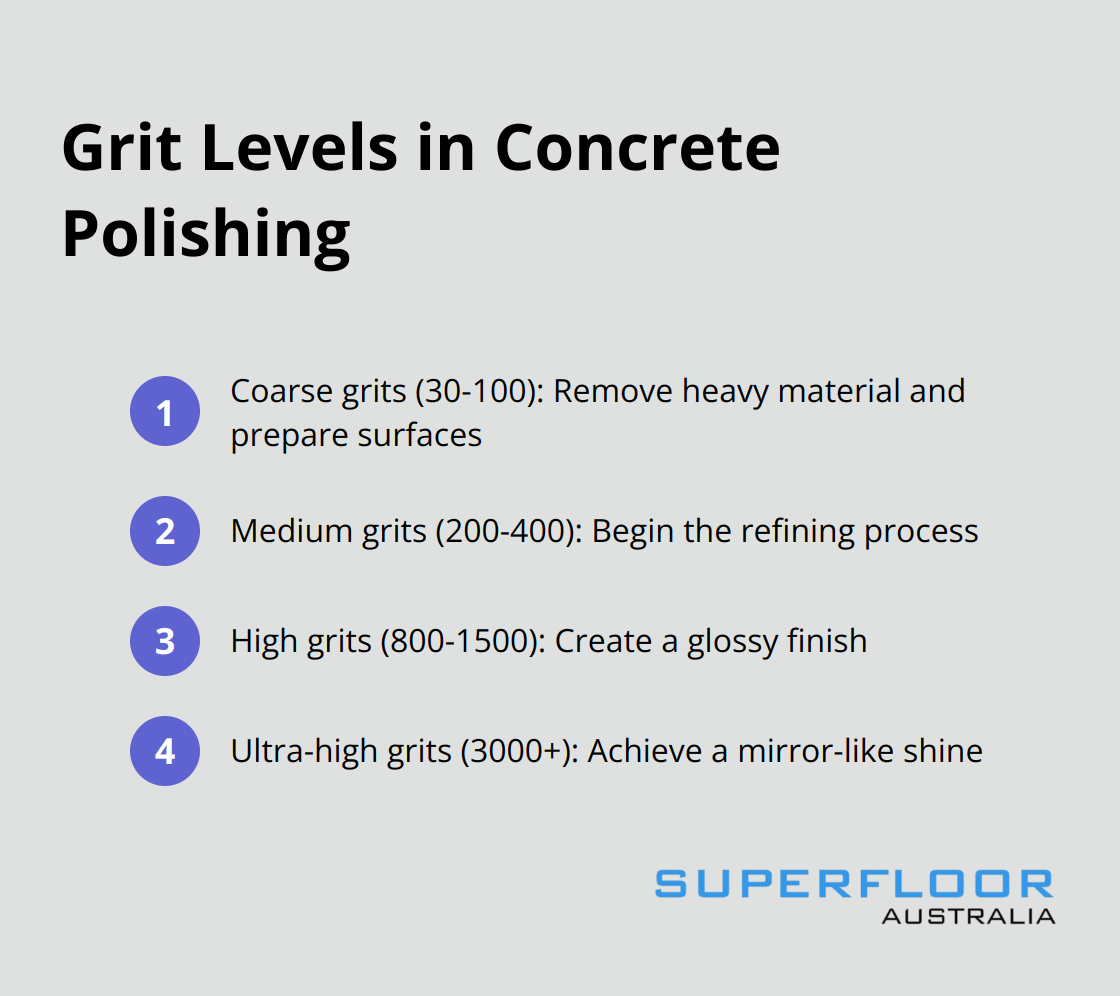
Polishing discs feature grit levels ranging from coarse to ultra-fine (typically starting at around 30 grit and going up to 3000 grit or higher). The Concrete Polishing Council categorises sheen finishes into four levels, from 1 to 4, corresponding to increasing grit levels.
Lower grits (30-100) remove heavy material and prepare surfaces. Medium grits (200-400) begin the refining process, while high grits (800-1500) create a glossy finish. Ultra-high grits (3000+) achieve a mirror-like shine.
Higher grit levels don’t always guarantee better results. Traction increases incrementally up to 800-grit, starts to plane off slightly at 1500, then decreases slightly at around 3000. All the grits are nonetheless within safety standards.
Selecting the Right Progression
Choosing the correct progression of grits proves crucial for achieving the desired finish. Skipping grits can result in visible scratches and an uneven surface. A systematic approach, gradually increasing the grit level, ensures a flawless finish.
Understanding these fundamental aspects of concrete polishing discs sets the stage for making informed decisions. The next section will explore the key factors to consider when selecting the most appropriate discs for your specific project needs.
What Impacts Your Choice of Polishing Discs?
Concrete Hardness and Condition
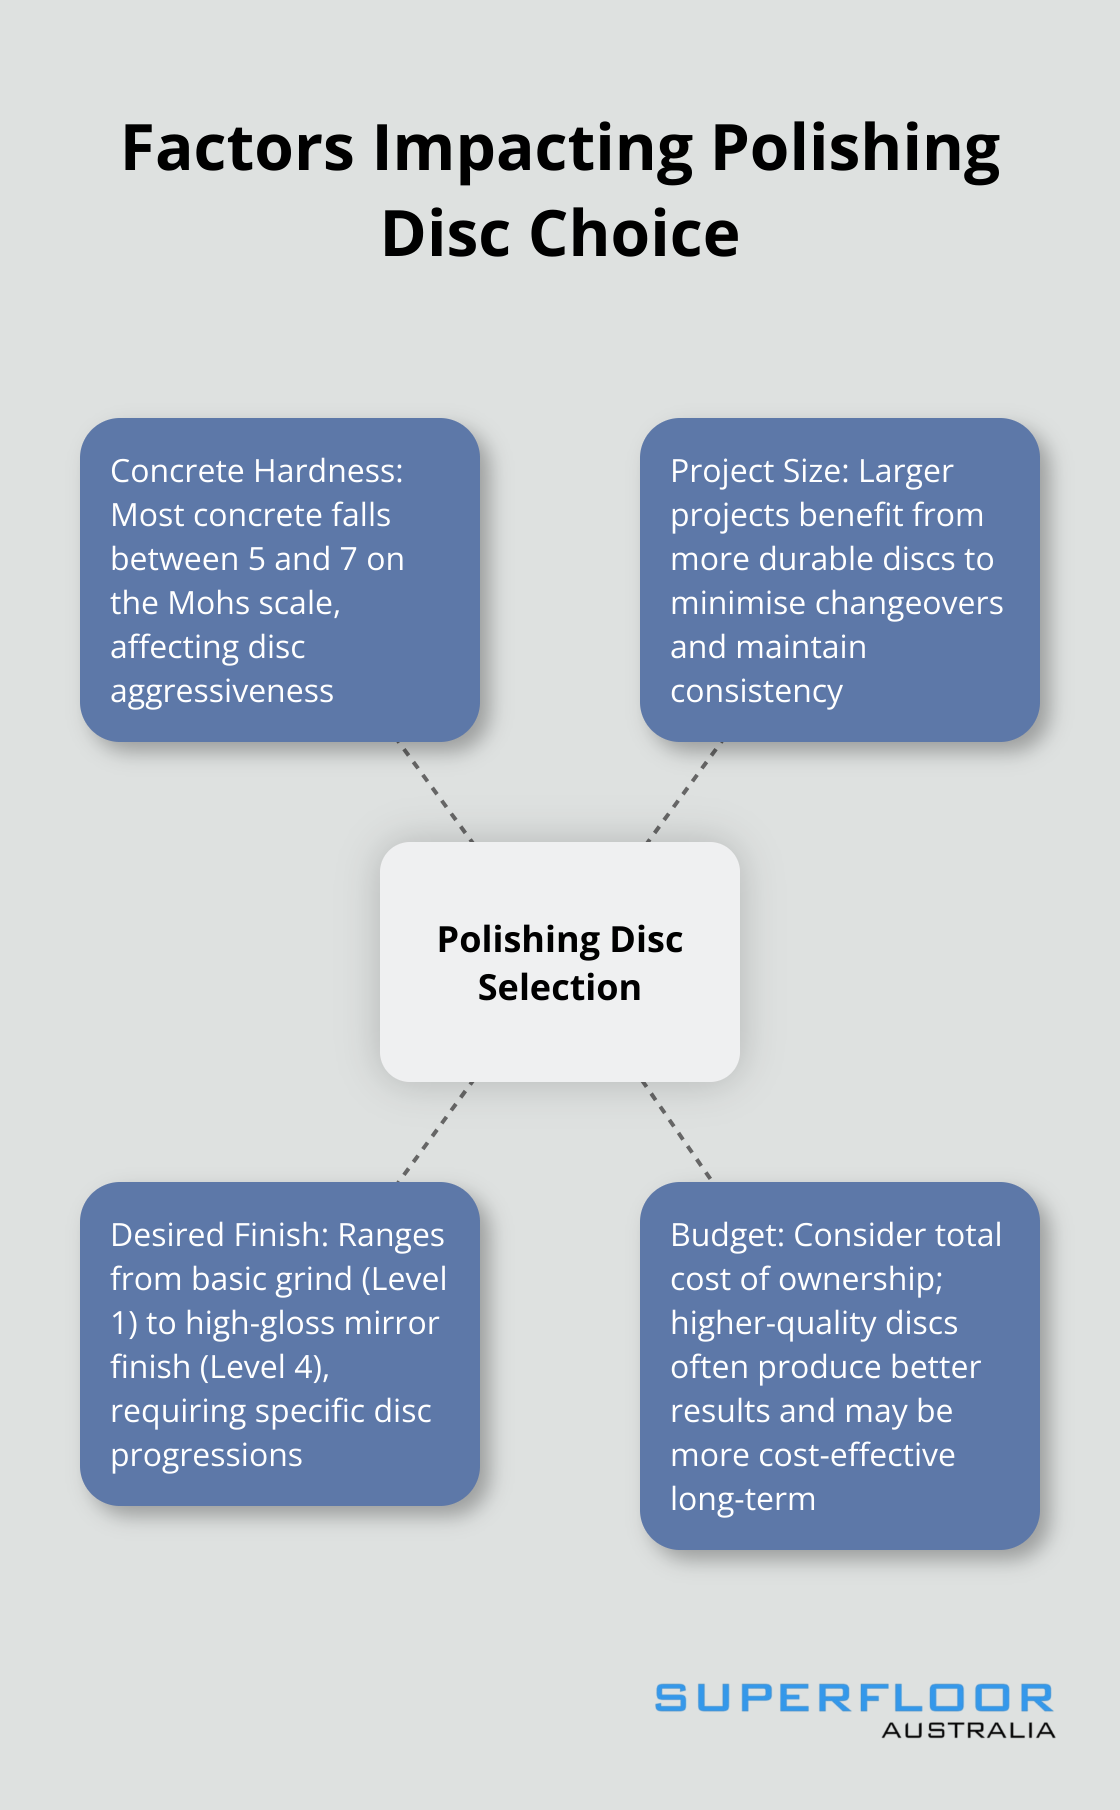
The hardness of your concrete surface significantly affects the choice of polishing discs. Harder concrete requires more aggressive discs with a softer bond, while softer concrete needs less aggressive discs with a harder bond. We use the Mohs scale (ranging from 1 to 10) to determine concrete hardness. Most concrete falls between 5 and 7 on this scale.
Surface condition also plays a vital role. Heavily damaged or uneven surfaces may require starting with more aggressive metal-bonded discs to level the floor before moving to finer grits. A floor with deep gouges might need to begin with a 30-grit metal-bonded disc, while a relatively smooth surface could start at 50 or even 100 grit.
Project Size and Timeline
The size of your project and your timeline directly influence disc selection. Larger projects often benefit from more durable, longer-lasting discs to minimise changeovers and maintain consistency. For instance, a 10,000 square foot warehouse floor might use discs with a lifespan of 10,000 square feet, reducing downtime and ensuring uniform results.
Time constraints can also impact your choice. If you work on a tight schedule, you might opt for more aggressive discs or a system that allows for fewer steps. However, rushing the process can compromise the quality of the finish.
Desired Finish Level
Your target finish level is perhaps the most important factor in disc selection. The Concrete Polishing Council’s classification system ranges from a basic grind (Level 1) to a high-gloss mirror finish (Level 4). Each level requires a specific progression of disc grits.
For a Level 1 finish, you might only need to progress to a 200-grit resin bond disc. A Level 4 finish, however, typically requires progression up to 3000 grit or higher. Higher grit doesn’t always mean better results. As mentioned earlier, traction peaks around 800 grit and slightly decreases at higher levels.
Budget Considerations
While it’s tempting to cut costs on discs, this can lead to poor results and higher long-term expenses. Lower-quality discs wear out faster, requiring more frequent replacements and potentially damaging the concrete surface.
Consider the total cost of ownership rather than just the upfront price. A $100 disc that lasts for 5,000 square feet is more cost-effective than a $50 disc that only covers 1,500 square feet. Additionally, higher-quality discs often produce better results, potentially reducing the need for rework or additional steps.
The selection of appropriate polishing discs involves careful consideration of multiple factors. Now that we’ve explored these key elements, let’s move on to discuss best practices for using concrete polishing discs to achieve optimal results.
Mastering Concrete Polishing Techniques
Perfect Your Progression
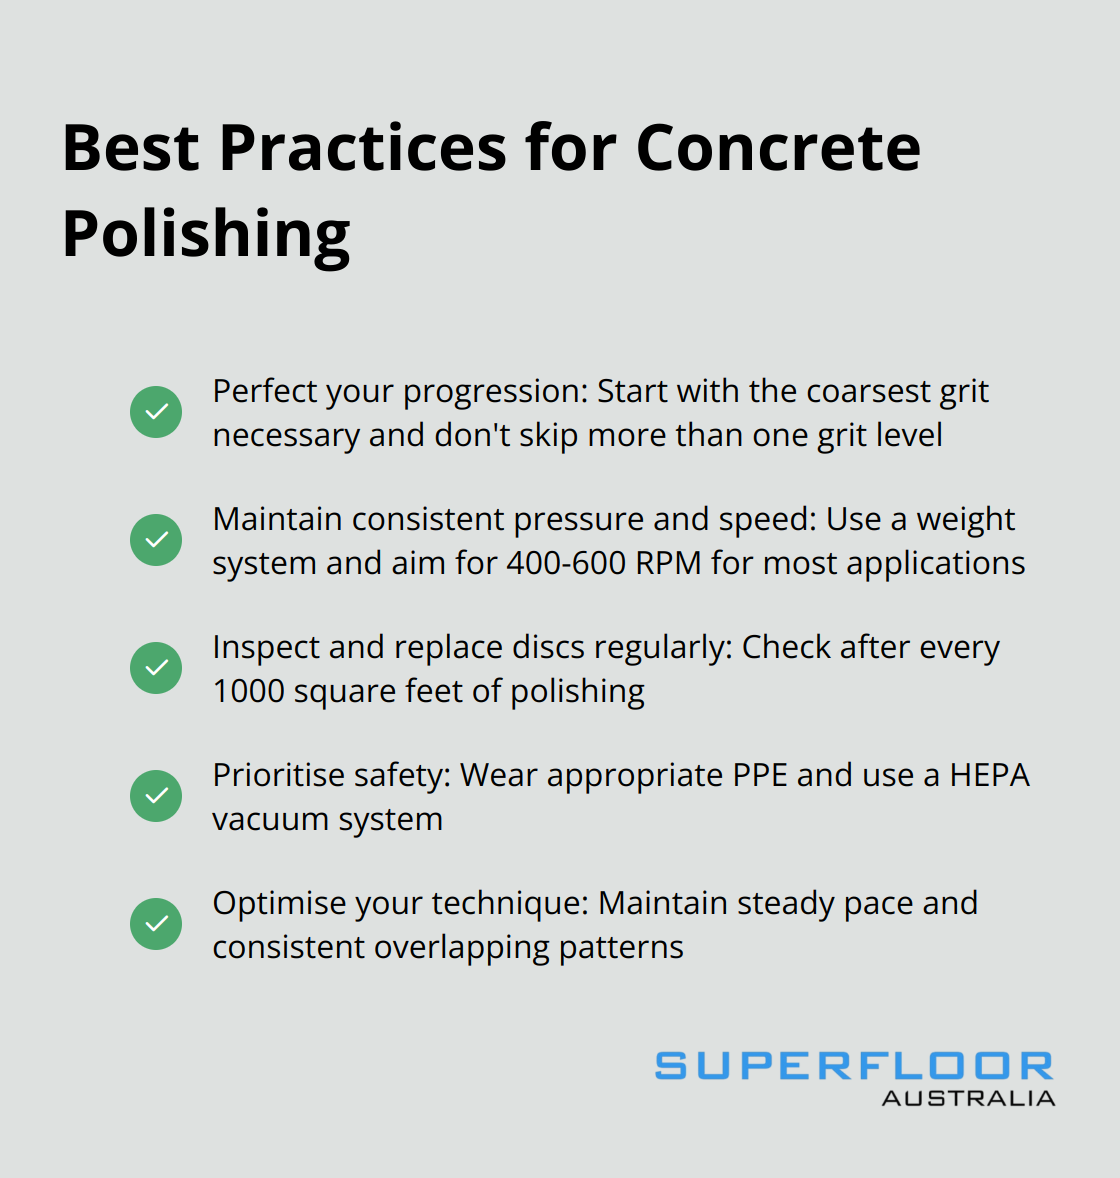
Start with the coarsest grit necessary for your concrete’s condition. For heavily damaged floors, this might be as low as 30 grit. For smoother surfaces, you might begin at 50 or 100 grit. Don’t skip more than one grit level as you progress. A typical progression might look like this: 30, 50, 100, 200, 400, 800, 1500, 3000. However, this can vary based on your specific project needs. For a level 2 finish, you might stop at 400 grit. For a high-gloss level 4 finish, you’ll need to go all the way to 3000 or beyond.
Maintain Consistent Pressure and Speed
Consistency is key in concrete polishing. Uneven pressure or speed can result in an inconsistent finish. Use a weight system on your polishing machine to maintain uniform pressure. This is especially important for larger areas. As for speed, slower isn’t always better. The optimal speed depends on your machine and the discs you’re using. Generally, a speed between 400-600 RPM works well for most applications. Always consult your equipment manufacturer’s guidelines.
Inspect and Replace Regularly
Worn discs can significantly impact your results. Inspect your discs after every 1000 square feet of polishing. Look for signs of wear such as missing diamonds or a smooth surface. Replace discs when they show significant wear. Don’t try to squeeze extra life out of worn discs. Using them past their prime can lead to inconsistent results and may even damage your concrete surface.
Prioritise Safety
Concrete polishing involves powerful machinery and potentially hazardous dust. Always wear appropriate personal protective equipment (PPE), including safety glasses, dust masks, and ear protection. Use a high-quality HEPA vacuum system connected to your polishing machine. This improves air quality and enhances the performance of your discs by keeping the surface clean. Be mindful of electrical safety. Keep cords and connections away from water, and regularly inspect your equipment for any signs of wear or damage.
Optimise Your Technique
Mastering concrete polishing takes time and practice. Try to maintain a steady pace and consistent overlapping patterns for even results. Pay extra attention to edges and corners, which often require hand-held tools for a uniform finish. Monitor the concrete’s temperature during polishing; excessive heat can cause damage. If you’re unsure about tackling a polishing project yourself, consult with professionals who have the experience and equipment to ensure a flawless finish.
Final Thoughts
The selection of concrete polishing discs significantly impacts your flooring project’s outcome. High-quality discs ensure better performance and can prove more cost-effective in the long run. Premium tools often outlast cheaper alternatives, reducing replacement frequency and minimising inconsistent finish risks.
Proper techniques complement the right tools for exceptional results. Correct disc progression, consistent pressure and speed, regular equipment checks, and safety measures form the foundation of flawless finishes. These practices (combined with appropriate tools) set the stage for outstanding outcomes.
Every polishing project presents unique challenges. For complex tasks or when unsure about the best approach, professional consultation is advisable. At Superfloor Australia, we offer high-quality polished concrete flooring solutions in Brisbane. Our expertise can help you achieve the perfect finish for your residential, commercial, or industrial space.