
At Superfloor Australia, we know that gluing down flooring on concrete requires precision and expertise.
Proper installation ensures durability, aesthetics, and longevity for your floors.
This guide will walk you through the essential steps to achieve a professional-quality glue-down flooring installation on concrete surfaces.
How to Prepare Your Concrete Subfloor
Surface Cleaning: The First Step
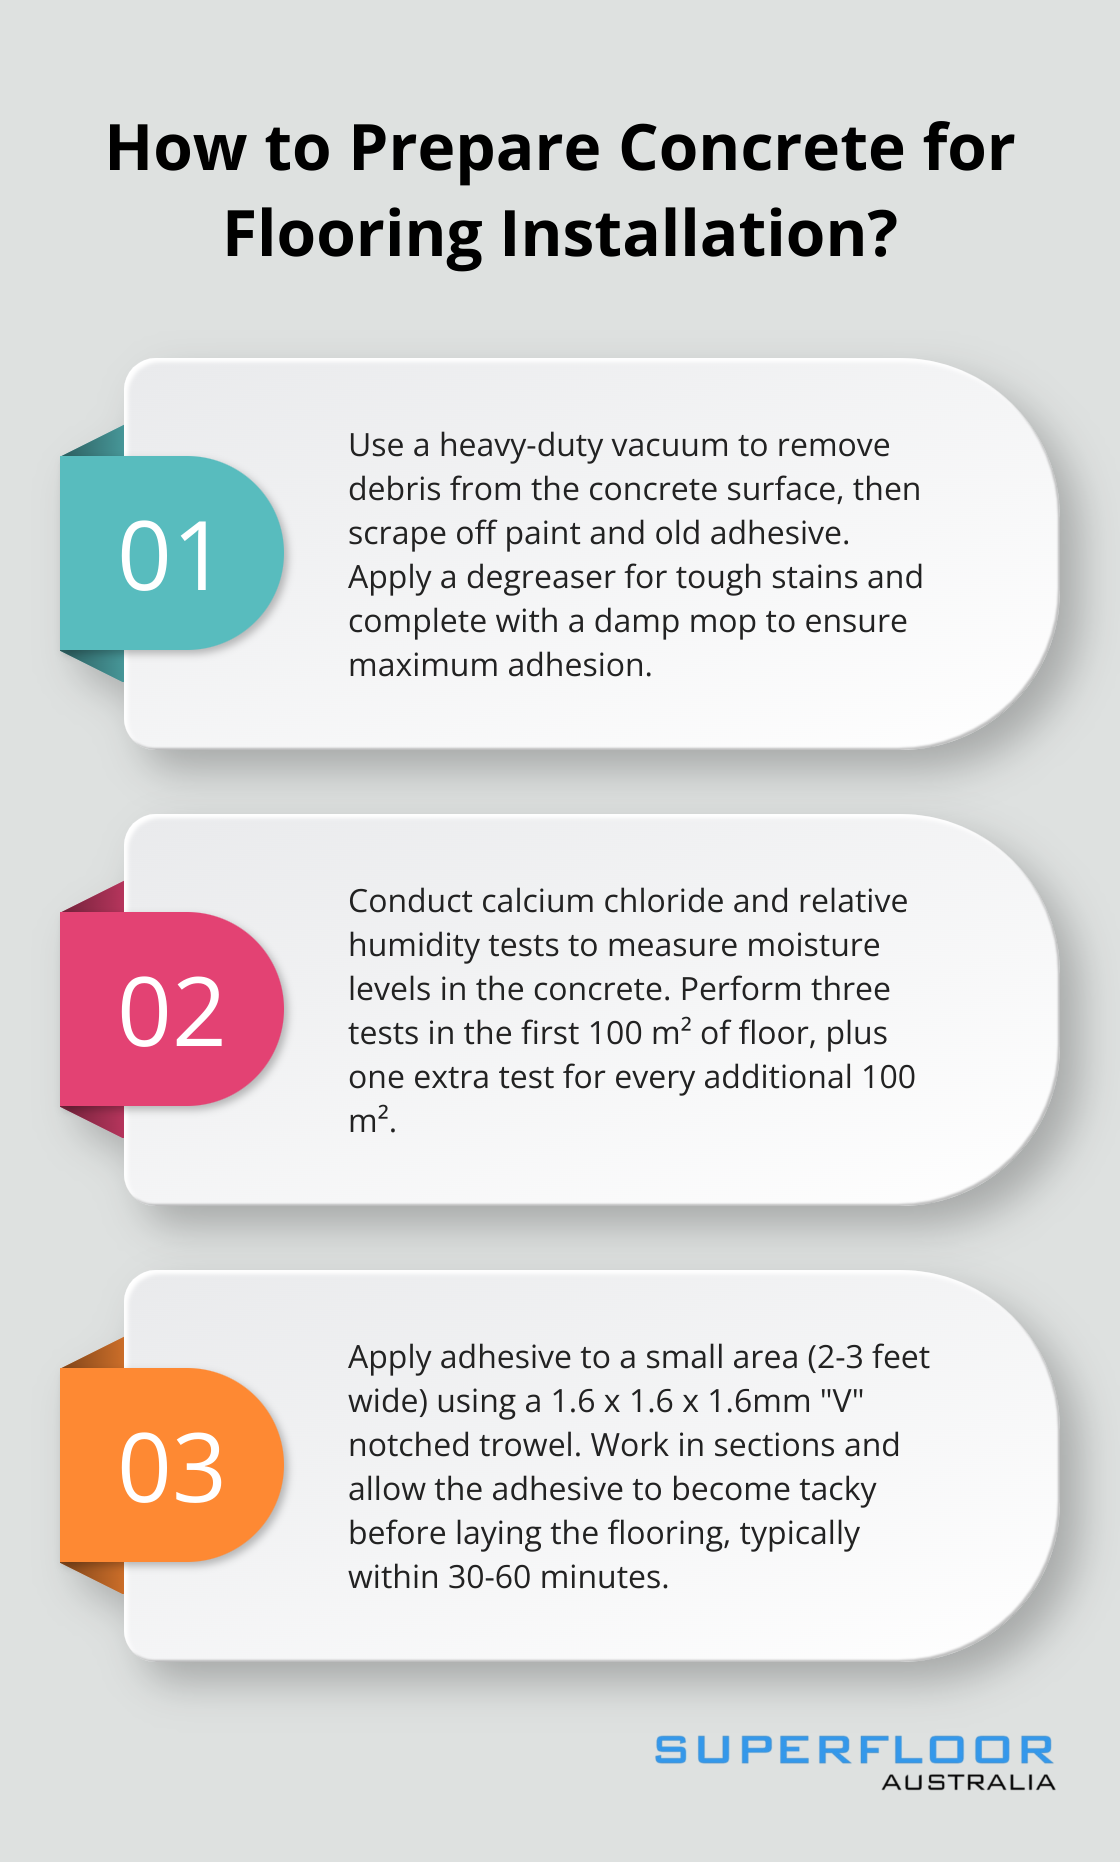
Start your project by removing all debris from the concrete surface. Use a heavy-duty vacuum to eliminate loose particles, then scrape off any paint, old adhesive, or other stubborn materials. For tough stains or grease, apply a degreaser or concrete etcher. Complete the cleaning process with a damp mop to pick up any remaining dust. A clean surface will ensure maximum adhesion and prevent future flooring issues.
Moisture Testing: A Critical Check
Excess moisture in concrete can damage your new flooring. Conduct calcium chloride and relative humidity tests to obtain accurate moisture readings. For concrete subfloors, three tests need to be carried out in the first 100 m² of floor, plus one extra test for every additional 100 m². If levels exceed the recommended thresholds, you’ll need to apply a moisture barrier before you proceed.
Leveling and Repairing: Smoothing the Way
Use a long straightedge to identify any dips or high spots in your concrete. Fill low areas with a self-leveling compound and grind down high spots with a concrete grinder. This level of flatness is essential for proper adhesive spread and to prevent gaps or hollow spots in your finished floor.
Priming: The Final Touch
In some cases, you may need to apply a primer to your concrete subfloor. A primer can improve adhesion, especially on very porous or very smooth surfaces. It can also help to seal any remaining dust or debris that might interfere with the adhesive bond. Check your flooring manufacturer’s recommendations to determine if a primer is necessary for your specific project.

With these steps completed, your subfloor will be in optimal condition for the next phase: choosing and applying the right adhesive. The time and effort you invest in proper subfloor preparation will pay off in the long-term performance and appearance of your new flooring (a fact we’ve observed time and time again at Superfloor Australia).
What Adhesive Should You Use?
Matching Adhesive to Flooring Type
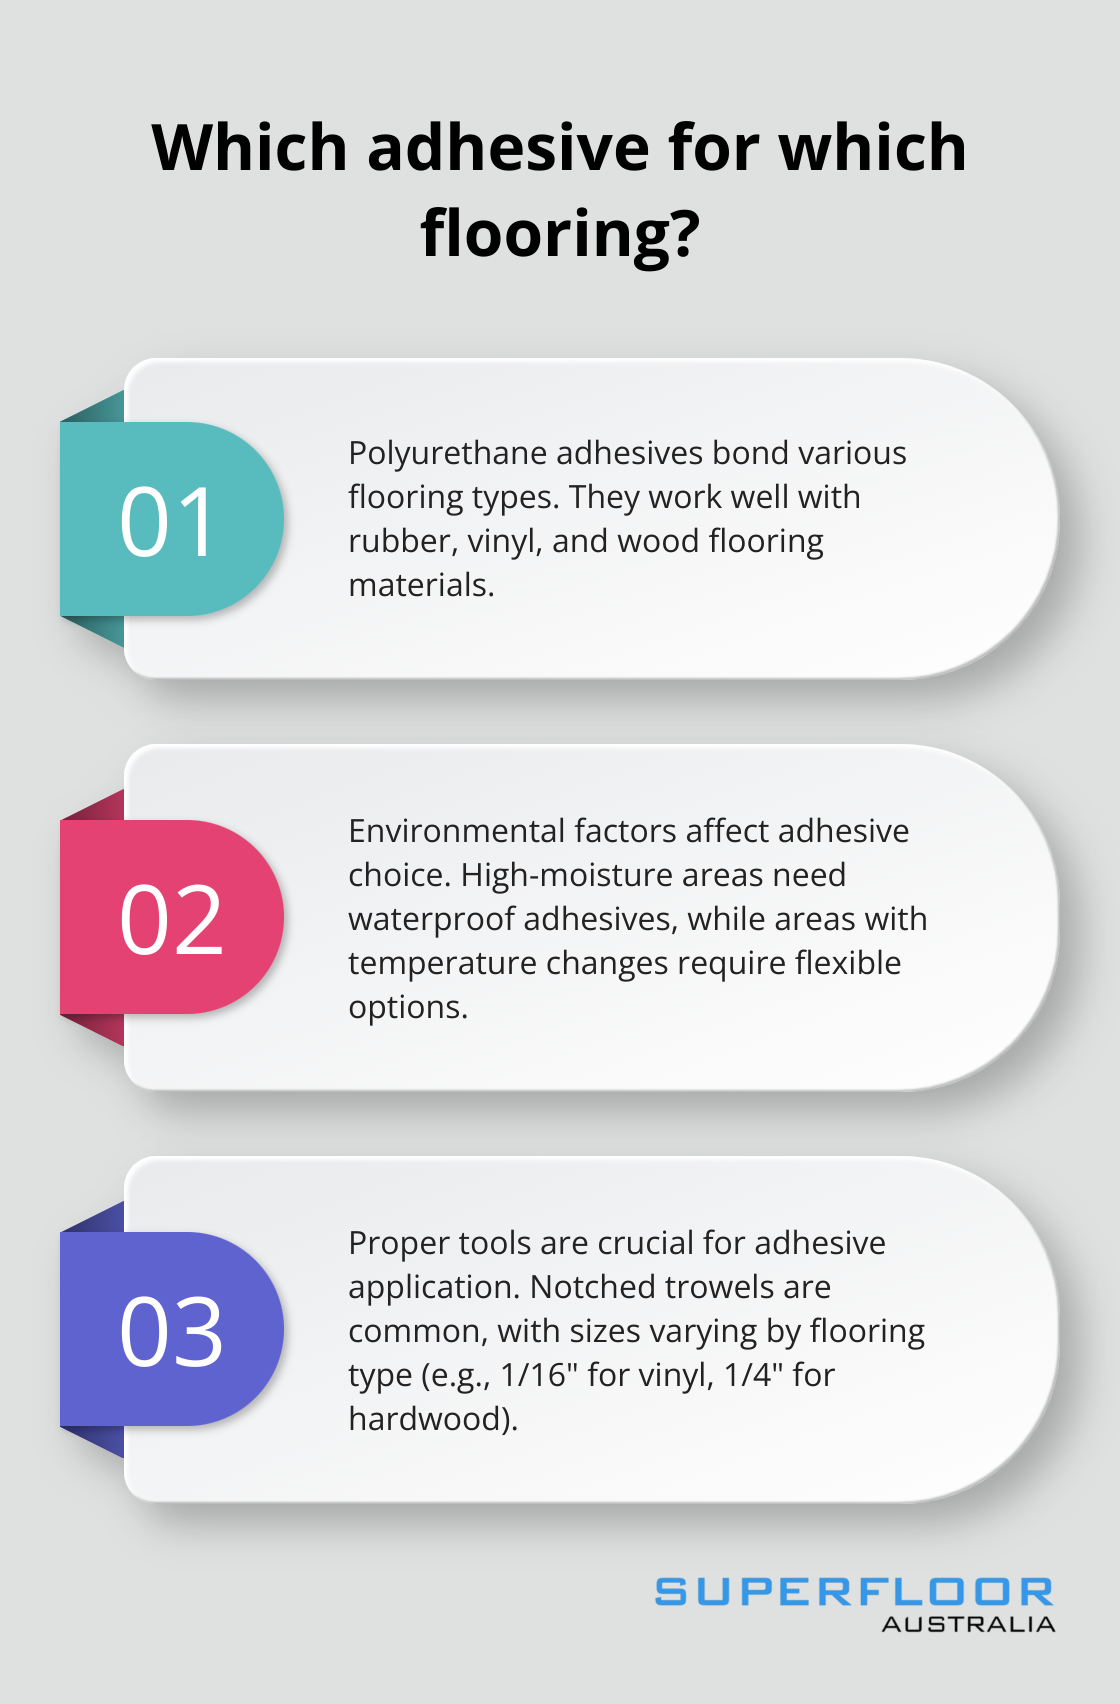
The selection of the right adhesive is a key factor for a successful flooring installation on concrete. Polyurethane adhesives are versatile and can effectively bond a wide range of flooring types, including rubber, vinyl, and various types of wood. Always check your flooring manufacturer’s guidelines for the recommended adhesive type.
Environmental Considerations
The environment where you install the floor plays a significant role in adhesive selection. High-moisture areas (like basements or bathrooms) may require a waterproof adhesive. For areas with temperature fluctuations, choose an adhesive that can withstand expansion and contraction. Traffic levels also matter – heavy foot traffic or rolling loads need a stronger, more durable adhesive.
Application Tools and Techniques
The right tools ensure proper adhesive application. Most installations require a notched trowel, but the specific notch size depends on your flooring type. For example, vinyl tiles might need a 1/16″ x 1/16″ x 1/16″ square-notch trowel, while hardwood could require a 1/4″ x 1/4″ x 1/4″ V-notch trowel. Some adhesives come in easy-to-use cartridges for precise application.
Drying Time Considerations
Factor in drying times when you plan your installation. In normal conditions, a 4-inch concrete slab can often handle light foot traffic by 24–48 hours. During this time, it’s important to limit foot traffic and avoid moving heavy furniture.
Manufacturer Recommendations
Always follow the manufacturer’s guidelines for adhesive application. These recommendations often include specific instructions for surface preparation, application methods, and curing times. Adherence to these guidelines can help ensure optimal performance and longevity of your flooring installation.
Now that you understand the key factors in adhesive selection, let’s move on to the step-by-step process of applying the adhesive and laying your new flooring.
How to Apply Flooring Adhesive and Install Your Floor
Acclimate Your Flooring
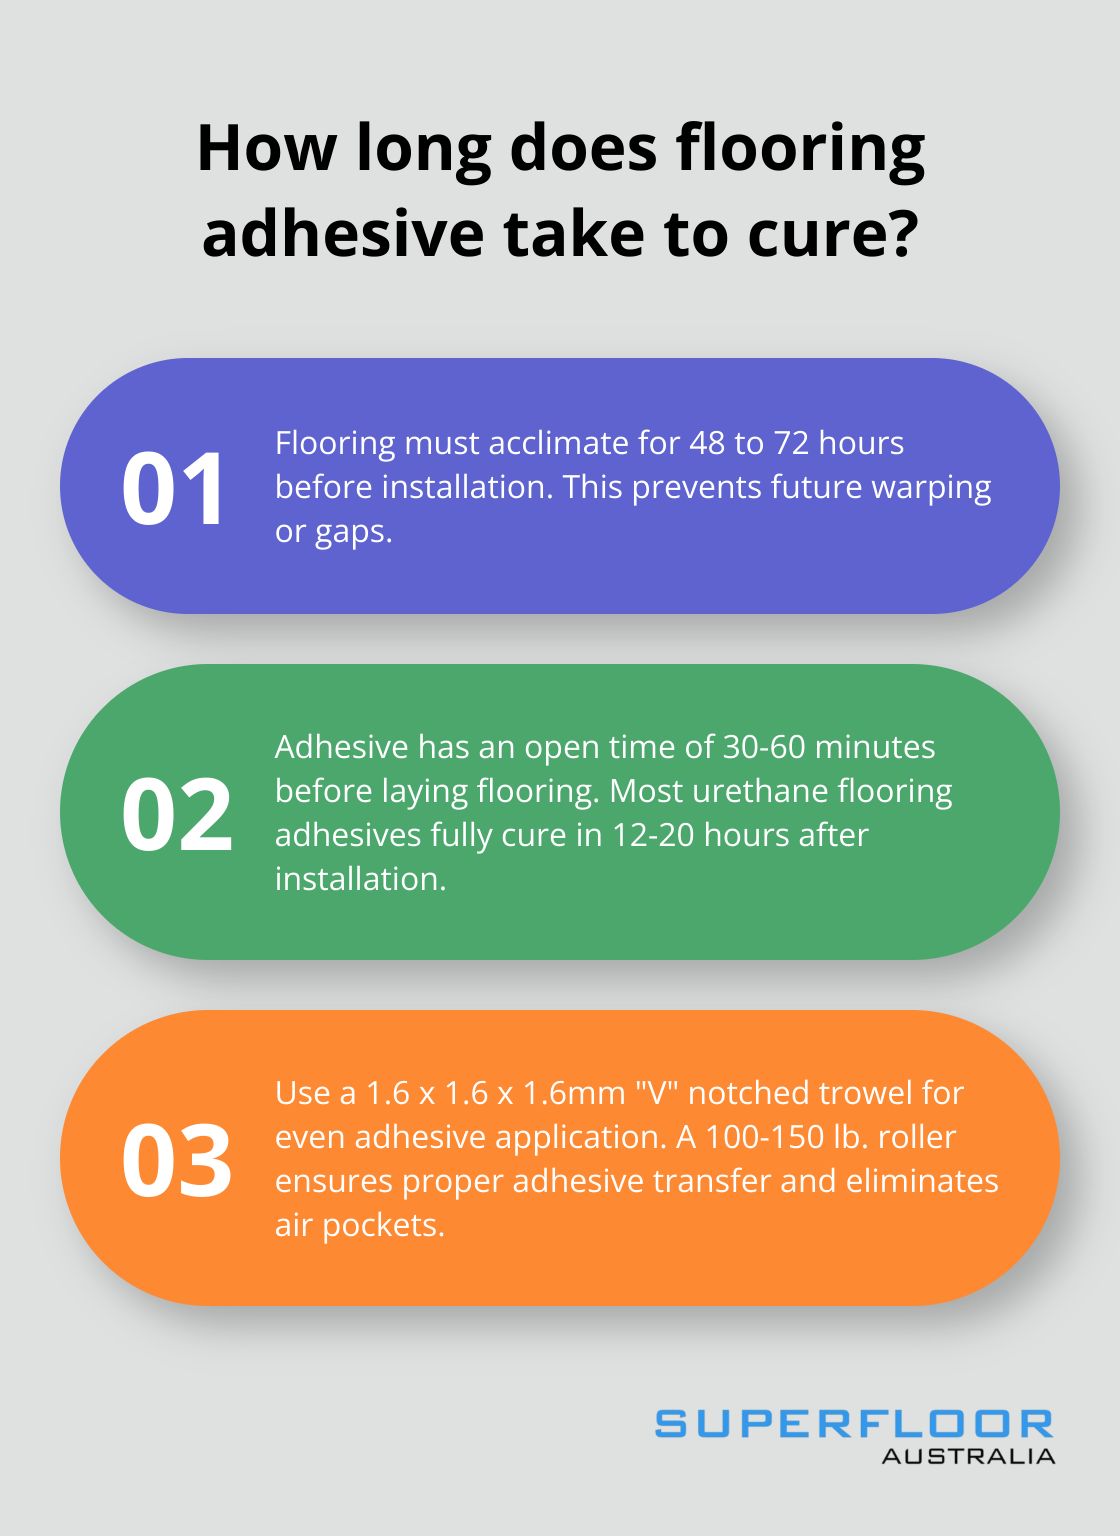
Before you open the adhesive, allow your flooring to adjust to the room’s conditions. Place the flooring in the installation area for 48 to 72 hours (depending on the product). Remove any packaging to allow air circulation. This step prevents future warping or gaps.
Apply Adhesive with Precision
Start by applying adhesive to a small area (about 2-3 feet wide). Use a 1.6 x 1.6 x 1.6mm “V” notched trowel to create even ridges. Work in sections to prevent the adhesive from drying before you lay the flooring. Allow the adhesive to become “tacky” before laying the vinyl onto the adhesive. Most adhesives have an open time of 30-60 minutes, so monitor your time closely.
Lay the Flooring Carefully
Begin laying your flooring at one corner of the room and work your way out. Press each piece firmly into the adhesive to ensure full contact. For wood planks, use a tapping block to fit the pieces together snugly. For tiles, use spacers to maintain consistent gaps. Check your pattern or design regularly as you work to keep it true.
Roll for Better Bonding
After you lay a section, use a 100-150 lb. roller to ensure proper adhesive transfer. Roll the entire floor in both directions, paying extra attention to the edges. This step eliminates air pockets and creates a stronger bond between the flooring and the adhesive.
Allow Proper Drying Time
After installation, let the adhesive cure properly. Most urethane flooring adhesives will fully cure 12-20 hours after they’re laid, depending on the humidity levels of the environment in which they’re installed. Maintain consistent temperature and humidity levels in the room during this time. This patience ensures your new floor will perform its best for years to come.
Final Thoughts
Gluing down flooring on concrete requires careful planning and precise execution. Each step, from subfloor preparation to adhesive selection and application, impacts the longevity of your new floor. Moisture testing, surface cleaning, and leveling create a solid foundation for installation, while choosing the right adhesive ensures a strong bond.
The complexity of this process often calls for professional expertise. Experienced installers possess specialized knowledge and tools to handle challenges like high moisture levels or uneven surfaces (saving you time and potential headaches). They can navigate tricky room layouts with ease, ensuring a floor that lasts for years.
For top-quality flooring solutions in Brisbane, Superfloor Australia offers expert polished concrete services. Their skilled team can transform concrete floors into stunning, durable surfaces that enhance your space. Consulting with professionals helps you make the best choice for your specific needs and achieve long-lasting results.