Painting concrete floors inside your house transforms dull surfaces into attractive, durable flooring that withstands daily wear. Many homeowners avoid this project thinking it’s too complex, but with proper preparation and technique, you can achieve professional results.
We at Superfloor Australia have guided countless customers through successful concrete floor painting projects. The key lies in thorough surface preparation and selecting the right materials for your specific needs.
What Surface Preparation Steps Matter Most
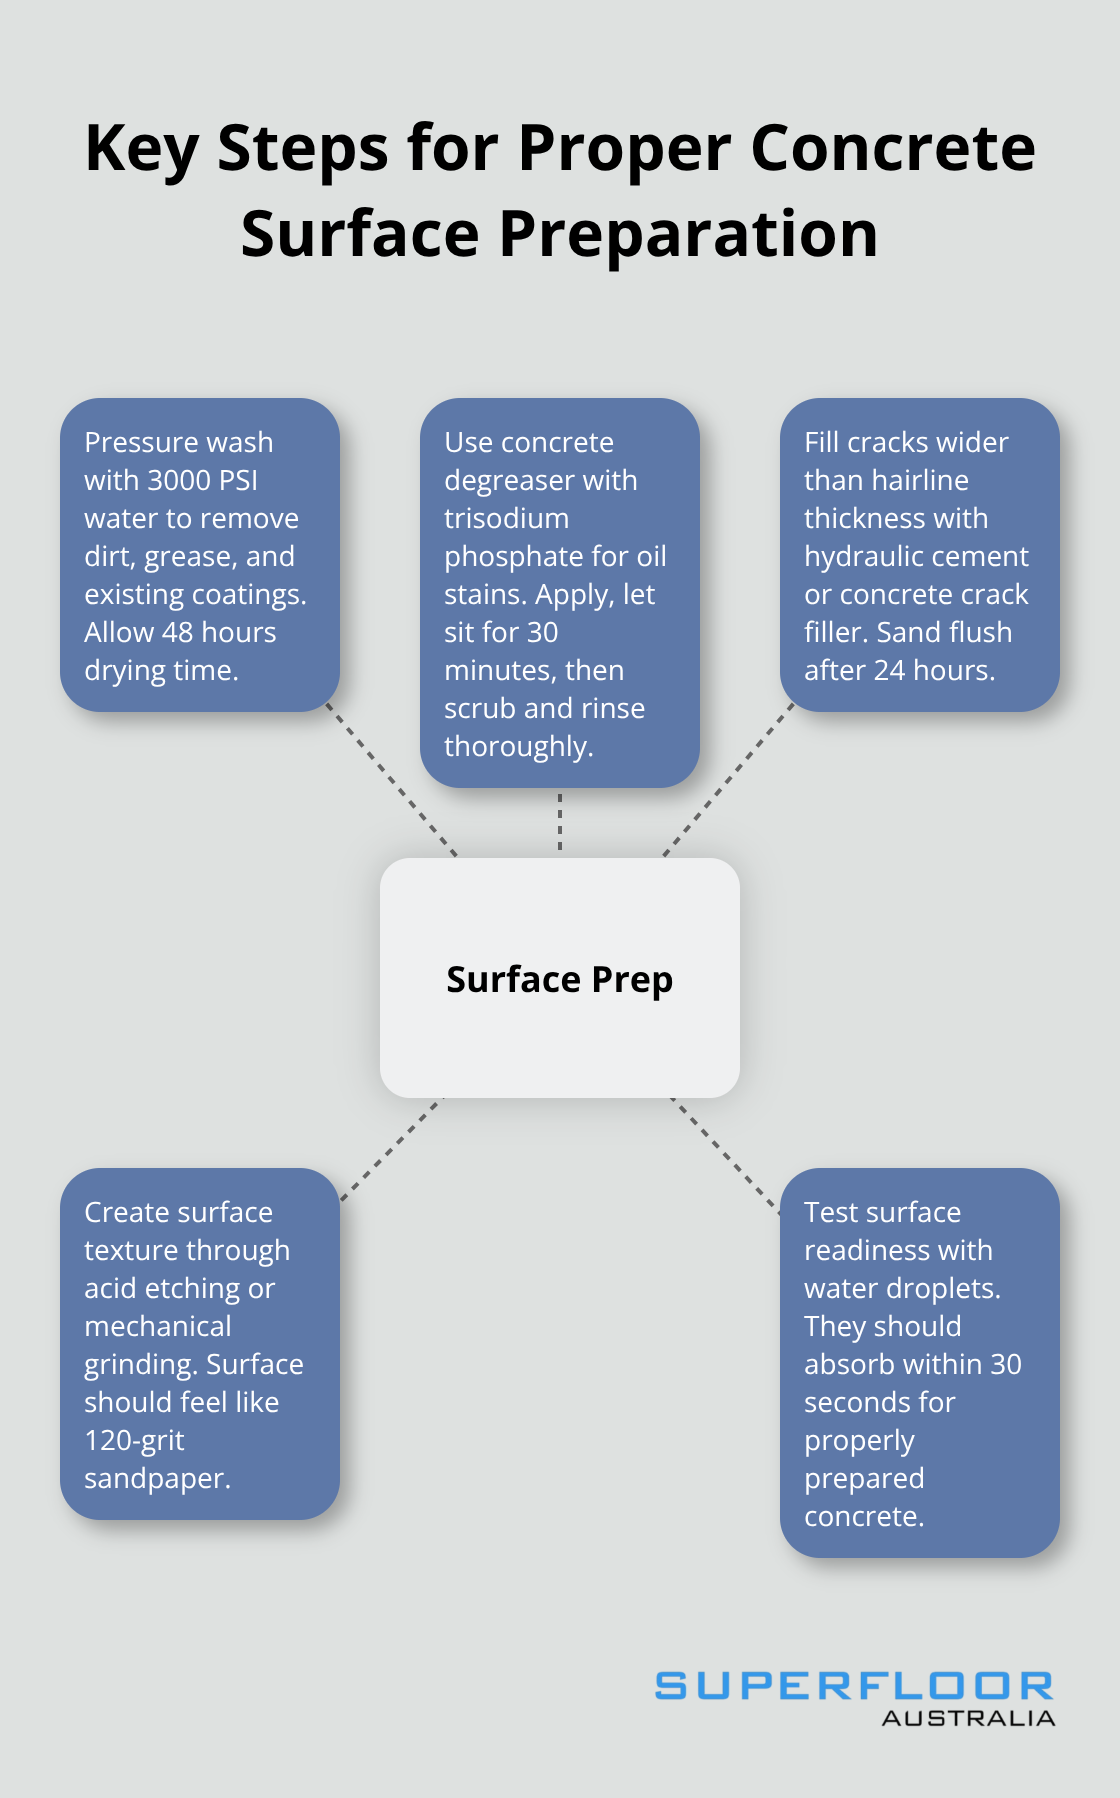
Proper surface preparation determines whether your painted concrete floor lasts two years or twenty years. Most paint failures happen because homeowners skip preparation steps, not because they chose the wrong paint. Start by pressure washing the entire floor with 3000 PSI water pressure to remove all dirt, grease, and existing coatings. Allow 48 hours of complete drying time after washing. Temperature should stay between 50-85°F during this period for optimal results.
Remove All Contaminants First
Concrete absorbs oil, grease, and chemical spills deep into its porous surface. Standard cleaning won’t remove these contaminants. Use a concrete degreaser with trisodium phosphate for oil stains. Apply the degreaser, let it sit for 30 minutes, then scrub with a stiff brush. Rinse thoroughly and repeat if stains remain visible. Any remaining contamination will cause paint to peel within months.
Fill Every Crack and Hole
Concrete cracks expand and contract with temperature changes. Fill all cracks wider than hairline thickness with hydraulic cement or concrete crack filler suitable for the operating conditions including temperature and thermal expansion. Mix the filler according to package directions and overfill slightly, as it will shrink during curing. Sand flush after 24 hours. Small pinholes need attention too, as they create weak spots where moisture can penetrate and lift paint.
Create Surface Texture for Adhesion
Smooth concrete won’t hold paint properly. Acid etching with muriatic acid removes loosely bound laitance and slightly etches the surface to create the microscopic texture paint needs to bond. Mix one part acid with ten parts water (always add acid to water, never the reverse). Apply with a plastic sprayer, let it foam for 10 minutes, then neutralise with baking soda solution. Alternatively, rent a concrete grinder with 80-grit diamond pads for mechanical preparation. The surface should feel like 120-grit sandpaper when ready for paint.
Test Surface Readiness
Water droplets should absorb into properly prepared concrete within 30 seconds. Sprinkle water across different areas of your floor to test absorption rates. Areas where water beads up need additional preparation work. This simple test prevents paint adhesion problems before they start.
Once you complete these preparation steps, you’ll need the right paint and tools to achieve professional results.
What Paint and Tools Work Best for Indoor Concrete
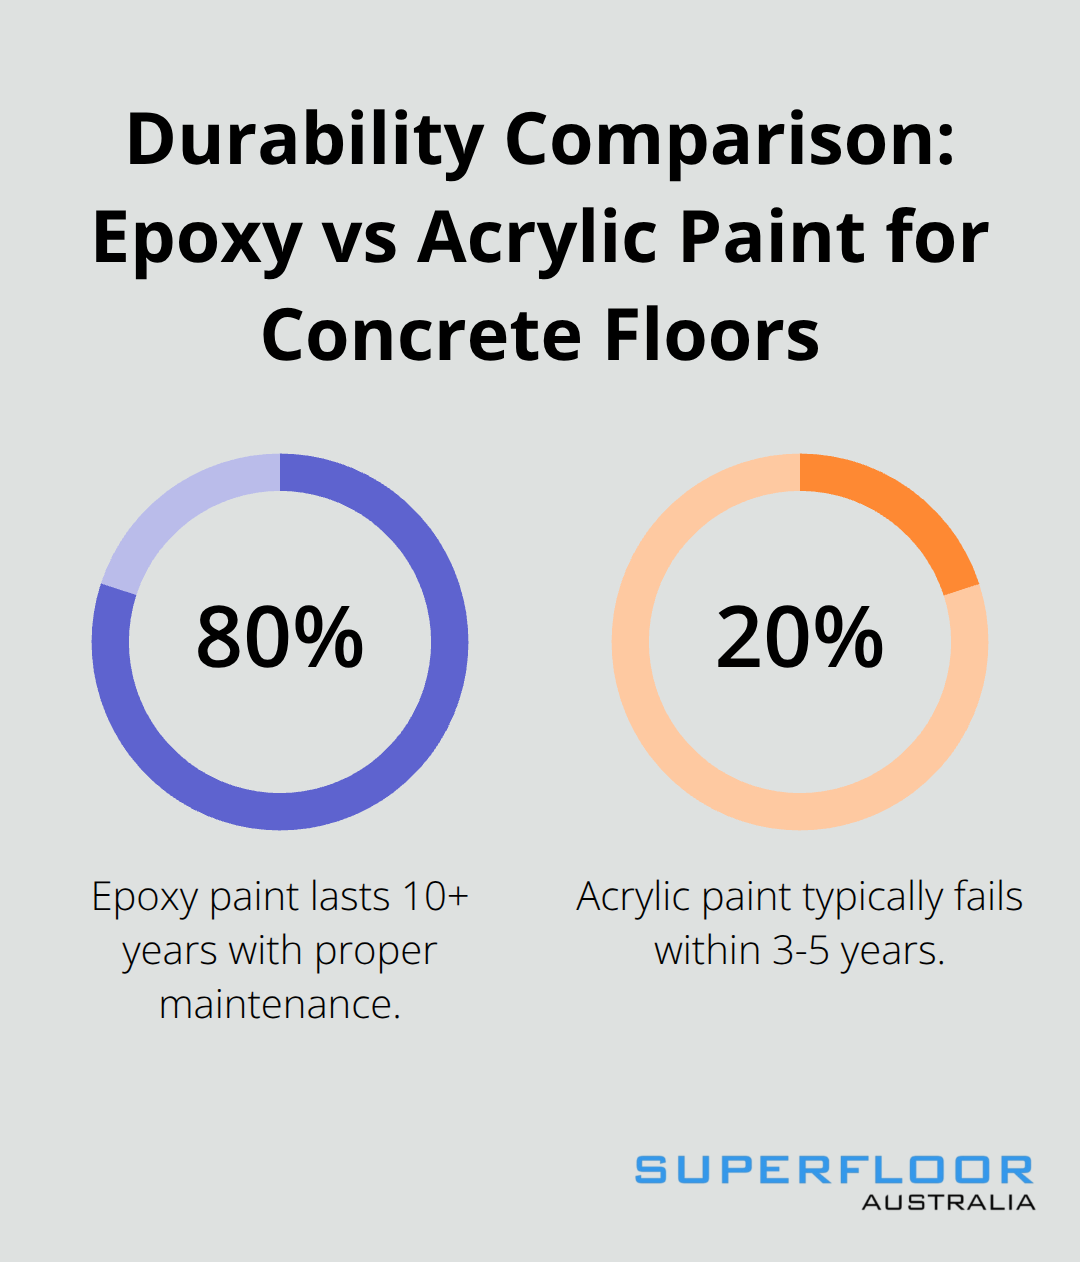
Epoxy paint beats acrylic paint for indoor concrete floors in every measurable way. Epoxy forms a chemical bond with concrete that provides long-lasting durability, while acrylic paint typically fails within 3-5 years. Two-pack epoxy systems deliver the highest durability for high-traffic areas like kitchens and garages. One gallon of quality epoxy covers 200-300 square feet (depending on surface texture). Water-based epoxy formulations offer low VOC emissions and easier cleanup without performance loss.
Professional Tools Create Better Results
Professional-grade 9-inch rollers with 3/8-inch nap sleeves spread epoxy evenly across smooth concrete. Cheap rollers leave lint and create uneven coverage that shows through the finished floor. Purchase angled 2-inch brushes for edges and corners where rollers can’t reach. Plastic paint trays work better than metal for epoxy because they won’t react with the coating. Safety equipment includes nitrile gloves, safety glasses, and organic vapour respirators rated for epoxy fumes. Knee pads prevent fatigue during long application sessions.
Calculate Coverage and Select Quality Primer
Measure your floor area and multiply by 1.15 to account for waste and surface irregularities. Most concrete floors need primer to achieve maximum paint adhesion. Concrete primer costs $40-60 per gallon but prevents costly paint failures. Apply primer with the same roller technique you’ll use for the topcoat. Ideal conditions maintain 50-90°F with controlled humidity for proper curing. Purchase 20% extra paint beyond calculated needs because colour matching later batches proves difficult.
With your materials and tools ready, the actual application process requires specific techniques to achieve professional results.
How to Apply Paint to Concrete Floors
Prime your prepared concrete floor at temperatures between 65-75°F for optimal adhesion and curing. Temperature fluctuations during primer application cause uneven penetration and weak spots that lead to paint failure. Apply primer with your 9-inch roller in 4-foot by 4-foot sections, work from the farthest corner toward your exit point. Roll in a W pattern first, then fill in with parallel strokes to eliminate roller marks. Primer penetrates concrete pores within 15 minutes, so work quickly but avoid rush. Allow 24 hours minimum dry time before topcoat application, regardless of manufacturer recommendations that suggest shorter times. Humidity above 60% doubles dry time and creates adhesion problems.
Start Paint Application From the Back Corner
Begin your first paint coat at the corner farthest from your exit door to avoid paint yourself into a corner. Mix your two-part epoxy according to exact manufacturer ratios with a drill-mounted paddle mixer for 3 minutes minimum. Inadequate mix creates colour variations and weak spots throughout your floor. Apply paint in the same 4-foot sections you used for primer, maintain a wet edge between sections to prevent lap marks. Roll each section three times: first application, back-roll perpendicular to the first direction, then final smooth strokes in the original direction.
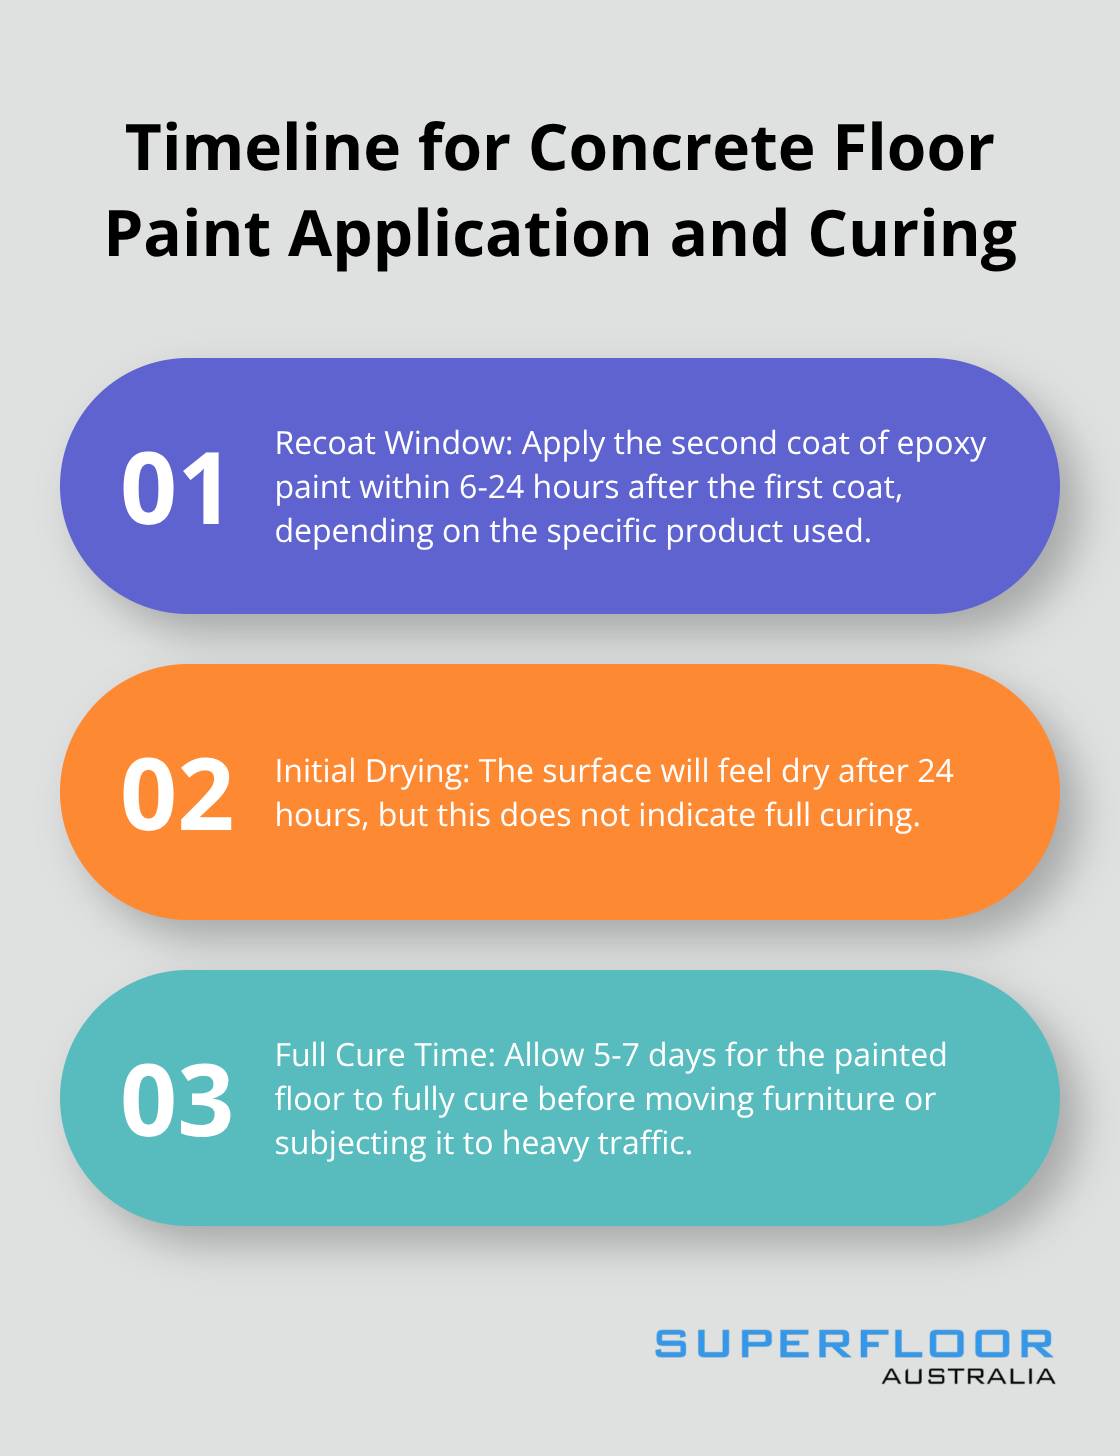
Apply Your Second Coat Within the Recoat Window
Most quality epoxy paints require a second coat for maximum durability and appearance. Apply the second coat within 6-24 hours after the first coat, depending on your specific product. Miss this recoat window means sand the entire floor before the second application. The second coat should go on thinner than the first, requiring about 75% of the paint volume. Work in the same systematic pattern but perpendicular to your first coat direction for best coverage. For heavy-duty situations, standard epoxy floor coatings can be installed at thicknesses of 0.375 inches or greater. Allow 5-7 days full cure time before moving furniture or subjecting the floor to heavy traffic, even though the surface feels dry after 24 hours.
Final Thoughts
Your painted concrete floor will last 10-20 years with proper maintenance. Sweep weekly and mop monthly with pH-neutral cleaners to preserve the epoxy coating. Avoid ammonia-based products that break down the chemical bonds, and place furniture pads under heavy items to prevent scratches.
Most homeowners fail at painting concrete floors inside house projects because they rush surface preparation or skip the primer. Temperature control during application prevents 80% of coating failures. Never paint when humidity exceeds 60% or temperatures drop below 50°F (these conditions cause adhesion problems that appear months later).
Professional installation becomes worthwhile for floors larger than 500 square feet or areas that require specialised slip-resistant additives. Complex repairs or multiple rooms often cost less when handled professionally. We at Superfloor Australia offer polished concrete solutions that eliminate paint maintenance entirely while delivering superior durability for Brisbane homes and businesses.