Concrete floor preparation determines whether your flooring project succeeds or fails. Poor preparation leads to adhesion problems, uneven surfaces, and costly repairs down the line.
We at Superfloor Australia have seen countless projects go wrong because of rushed or inadequate surface preparation. The right approach saves time, money, and frustration.
Essential Tools and Materials for Concrete Floor Preparation
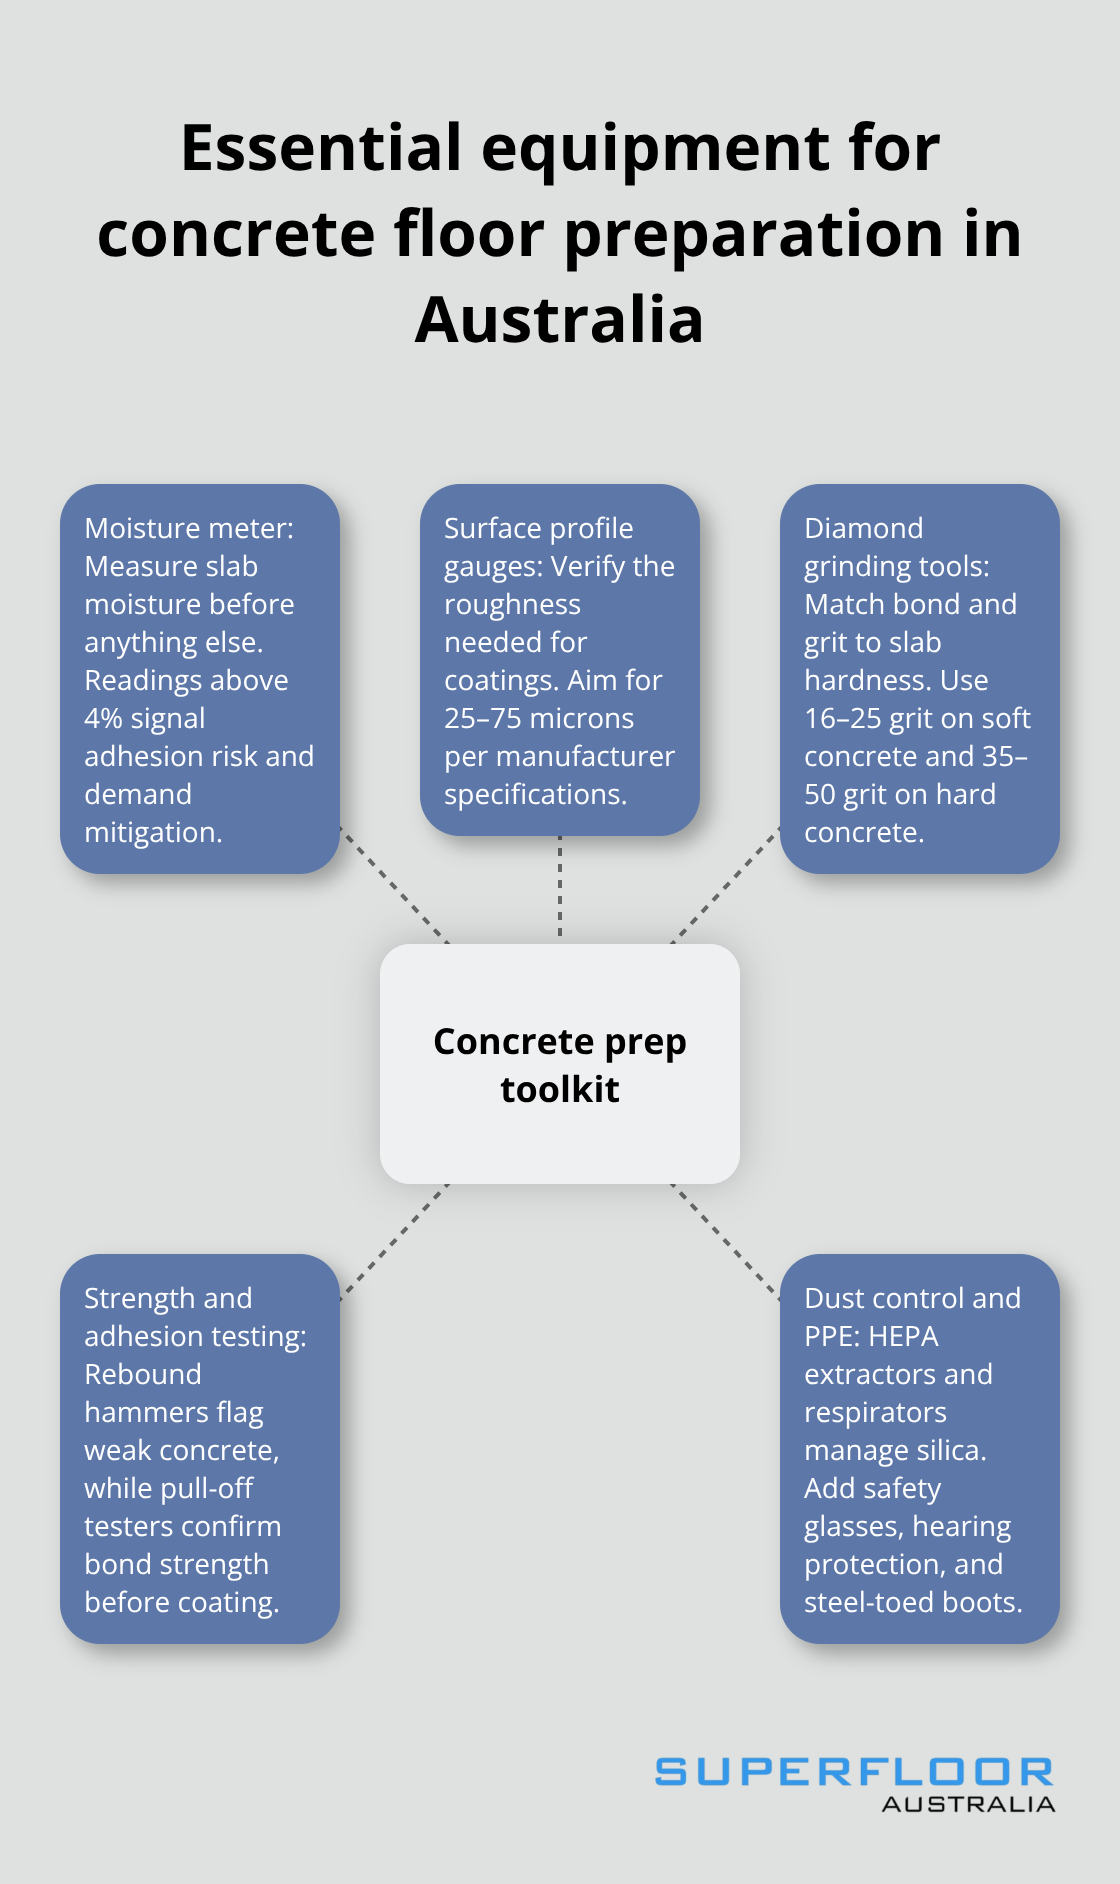
Professional concrete floor preparation requires specific equipment that many DIY enthusiasts underestimate. A concrete moisture meter becomes your first investment – moisture levels above 4% will cause adhesion failures regardless of your surface preparation quality. The Tramex Concrete Moisture Encounter costs around AUD 800 but prevents thousands in future repairs. Surface profile gauges measure the roughness needed for proper coating adhesion, with most coatings requiring a profile between 25-75 microns. Skip the basic grinding discs and invest in diamond grinding tools rated for your specific concrete hardness – soft concrete needs 16-25 grit bonds while hard concrete requires 35-50 grit bonds.
Surface Assessment and Testing Equipment
Rebound hammers test concrete strength and identify weak spots that grinding cannot fix. Concrete with compressive strength below 25 MPa needs repair before any surface treatment. Pull-off adhesion testers (costing around AUD 1,200) measure existing coating adhesion and predict new coating performance. Surface roughness comparators provide immediate visual reference for achieving proper surface profiles without expensive electronic gauges.
Grinding and Polishing Machinery
Single-phase 250mm grinders handle residential projects up to 200 square metres effectively, while three-phase planetary grinders become necessary for commercial spaces. Self-propelled shot blasting machines (starting at AUD 52,000) remove tough epoxies and adhesives that grinding cannot handle.
These machines deliver consistent results across large areas where manual grinding would take weeks.
Safety Equipment and Protective Gear
HEPA dust extractors like the Rubicon DE3000 maintain air quality and prevent concrete dust from compromising your respiratory health during extended grinding sessions. Proper respiratory protection becomes non-negotiable when working with silica dust. Safety glasses, hearing protection, and steel-toed boots complete your essential safety kit for any concrete preparation project.
Once you have assembled the right equipment, the actual preparation process follows a systematic approach that maximises your investment in quality tools.
Step-by-Step Concrete Floor Preparation Process
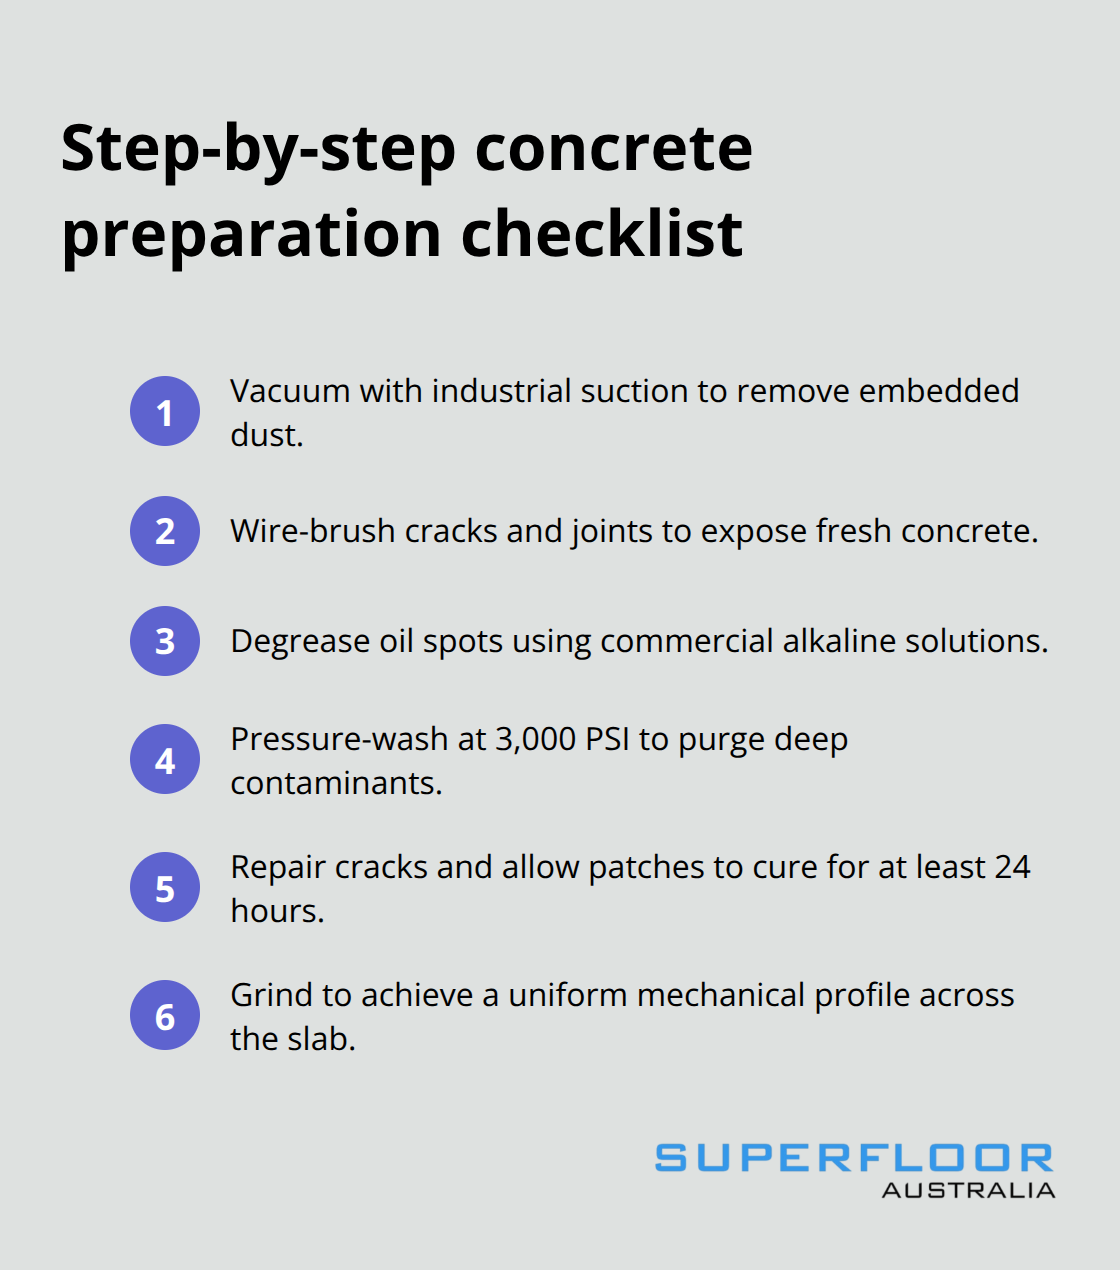
Surface preparation starts with aggressive vacuuming that uses industrial equipment with motors from 2,600 up to 6,300 watts to remove all loose debris, dust, and construction residue. Standard shop vacuums lack the suction power needed for embedded particles that compromise adhesion. Wire brush all cracks and joints immediately after vacuuming to expose fresh concrete surfaces. Oil stains require degreasing with alkaline cleaners that provide effective cleaning performance, followed by high-pressure washing at 3,000 PSI minimum. Water alone cannot remove the molecular oil penetration that prevents coating adhesion.
Initial Surface Cleaning and Debris Removal
Professional cleaning removes contaminants that standard sweeping misses completely. Industrial vacuums extract embedded particles from concrete pores that would otherwise create weak spots in your final coating. Degrease oil-contaminated areas with commercial alkaline solutions before any mechanical preparation begins. High-pressure washing at 3,000 PSI forces out deep-seated contaminants that compromise long-term adhesion performance.
Crack Repair and Surface Levelling Techniques
Hairline cracks under 1mm width receive epoxy injection treatment, while structural cracks exceeding 3mm require hydraulic cement patching. Industry standards mandate that crack repairs cure for 24 hours minimum before grinding begins. Self-levelling overlays (starting at 3mm thickness) address uneven surfaces that exceed 3mm variation per linear metre. Expansion joints need complete removal and replacement with flexible sealants rated for your specific climate conditions.
Surface Profile Achievement Through Diamond Grinding
Diamond grinding creates the mechanical profile necessary for coating adhesion, with most industrial coatings requiring proper surface preparation standards for optimal performance. Single-pass grinding with 16-grit diamonds on soft concrete achieves this profile, while hard concrete demands multiple passes with progressively finer grits. Pull-off adhesion testing at random locations confirms surface preparation quality – readings below 1.5 MPa indicate inadequate preparation requiring additional grinding.
Final Surface Testing and Quality Control
Surface moisture testing with carbide bomb tests provides definitive moisture readings within 24 hours, eliminating guesswork about substrate readiness. Test multiple areas across your prepared surface to identify potential problem zones before coating application. Document all test results to verify compliance with manufacturer specifications and warranty requirements.
Even with proper equipment and systematic preparation, specific mistakes can undermine your entire project and waste your investment in quality materials.
Common Mistakes to Avoid During Concrete Preparation
Surface Contamination Creates Adhesion Failures
Contractors who skip thorough degreasing create invisible failure points that appear months later as coating delamination. Oil penetration extends 6-12mm into concrete pores and requires alkaline degreasers with minimum 12% sodium hydroxide concentration followed by acid neutralisation. Standard mopping cannot remove molecular contamination that prevents chemical bonds between substrate and coating.
Projects fail within 18 months when contractors assume visual cleanliness equals preparation readiness. Concrete dust from previous operations also blocks adhesion – industrial vacuum systems with 1,100 watt motors extract embedded particles that shop vacuums leave behind.
Rushed Preparation Compromises Surface Profile Quality
Single-pass operations with aggressive diamonds create inconsistent surface profiles that range from 15 microns in soft spots to 85 microns in hard areas. Most industrial coatings require uniform surface profiles for optimal adhesion performance according to Australian coating standards.
Contractors who rush through preparation achieve adequate pull-off strength in test areas while they miss weak zones that cause premature coating failure. Multiple passes with progressively finer grits (from 16-grit to 80-grit) create consistent mechanical profiles across concrete with different hardness levels. Surface preparation determines 80% of your success before you start any grinding operation.
Environmental Conditions Affect Preparation Success
Relative humidity above 85% prevents proper moisture evaporation and creates adhesion problems regardless of surface preparation quality. Temperature fluctuations that exceed 10 degrees Celsius during the preparation process cause concrete expansion that compromises newly achieved surface profiles.
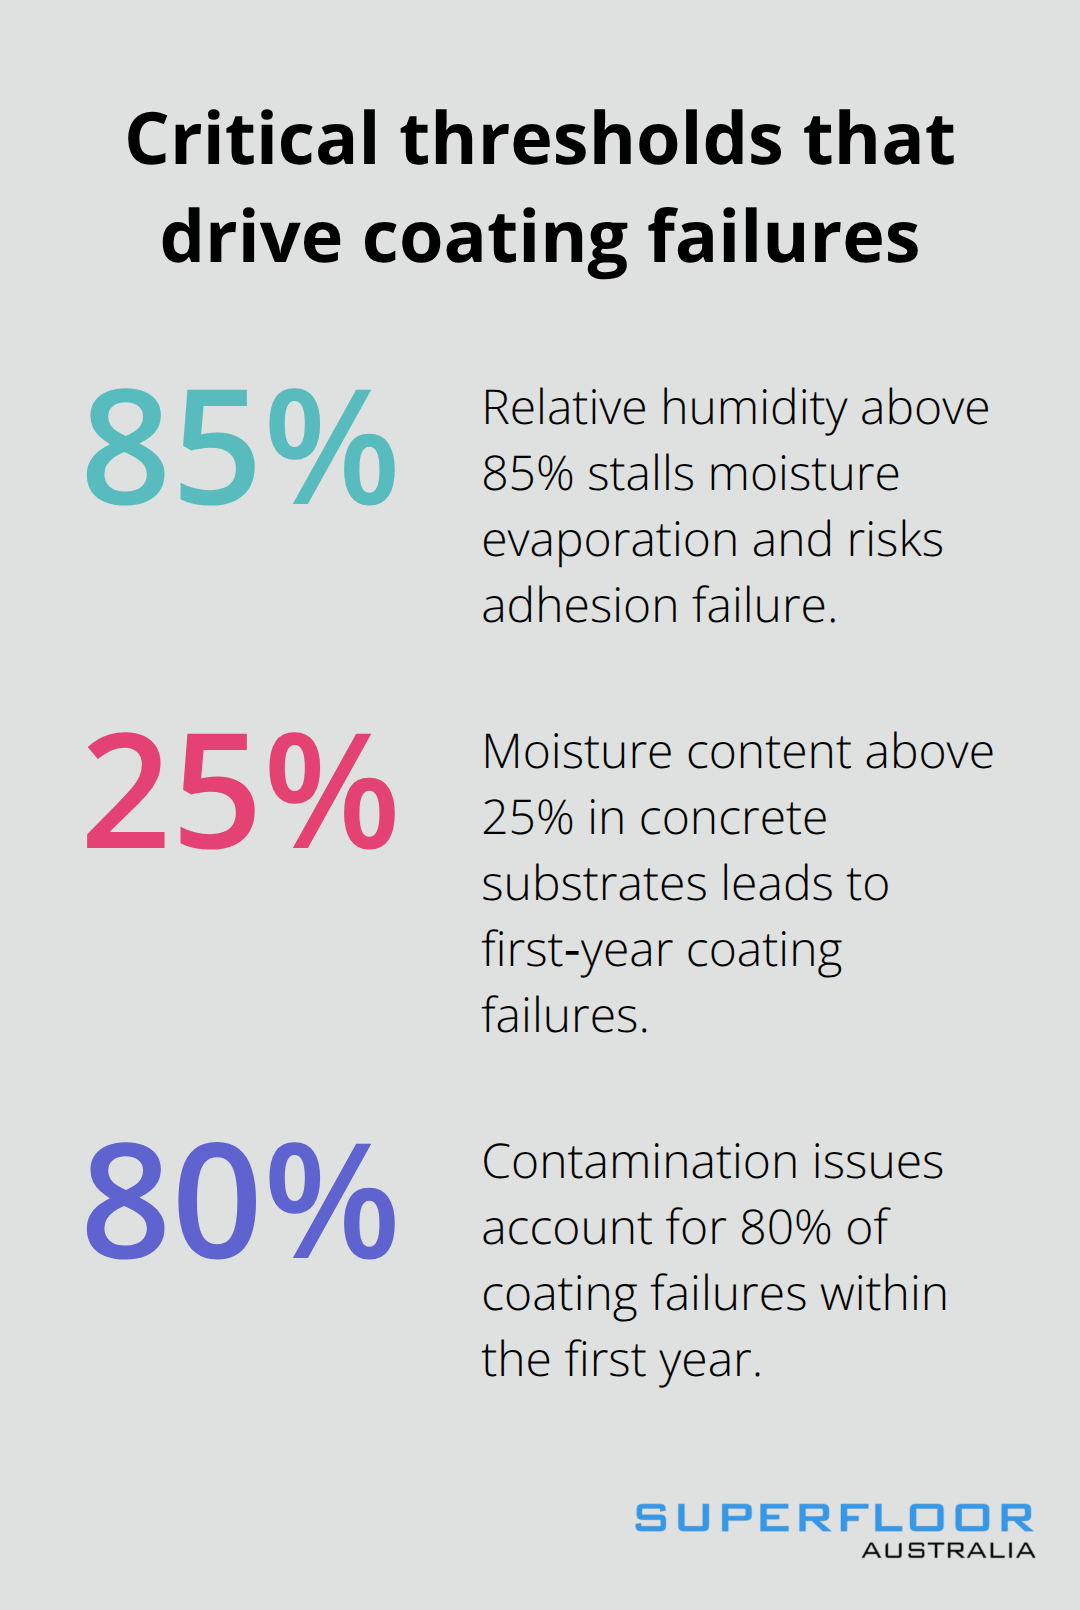
Moisture content above 25% water content in concrete substrates leads to coating failures within the first year of installation. Professional moisture testing with carbide bomb tests provides accurate readings that prevent costly adhesion problems later. Allow the concrete to dry completely for 48 hours minimum before applying any sealers or coatings.
Final Thoughts
Successful concrete floor preparation demands systematic execution of moisture tests, thorough surface cleaning, crack repairs, and diamond grinding to achieve proper surface profiles. Professional equipment like HEPA dust extractors and industrial vacuums prevents contamination issues that cause 80% of coating failures within the first year. The investment in quality preparation pays dividends through extended floor life and reduced maintenance costs.
Professional services eliminate guesswork around moisture content, surface profiles, and environmental conditions that determine project success. We at Superfloor Australia combine precision preparation with expert craftsmanship to deliver polished concrete solutions. Our systematic approach addresses the technical requirements that separate successful installations from costly failures.
Your next step involves choosing between DIY preparation with proper equipment or professional services that guarantee results. Either path requires commitment to the systematic process outlined above. Shortcuts during concrete floor preparation create problems that surface months later as adhesion failures and premature wear (often within 12-18 months of installation).